sewing

Red cotton Archer shirt

My latest sewing project is one I’m very happy with – my red cotton Archer shirt.  This is a pattern by Grainline Studio and is available as a paper pattern or a PDF. I have the PDF version, which has been marinating on my hard drive for some time now!

IMG_0448

This is the first time I’ve made an Archer and I’m really happy with how simple it is.  There are no darts or panels to provide bust or waist shaping, which gives it a relaxed fit.  There’s a small pleat in the back for ease and a double yoke.  IMG_0449

I didn’t bother to do a top button because I never do it up anyway, and it’s always so hard to get my machine to sew in that bulky party!IMG_0450

I wasn’t too happy with my plackets, but they pressed out ok.  I suspected that the pattern or instructions were slightly off there – it doesn’t really tell you how to place the cuff over the plackets.  As a result it’s a bit bulky there where I fudged it a little.IMG_0451

I didn’t have much of this fabric so I did the inner yoke in a flannelette fabric that was kicking around my stash and before that my mum’s stash.  I think I have dolly clothes made from that!  As you can see here, I used a bias binding to finish the hem.  I find it really hard to do a double-folded hem on a curve so this helped a lot to reduce bulk and curve nicely.IMG_0500

And I’ve pretty much been living in this shirt in the 2 weeks since I made it!IMG_0504

The only thing I wish I’d done better was my button placement.  Because I left out the top button, it got a bit off and the lowest button is a bit too low.  As a result I don’t do up that bottom button often.  It doesn’t make a huge difference though and I love the shirt!

bras, lingerie, sewing

I made bras!

I made a bra! In fact I’ve made TWO bras!

Bras are all the rage on the sewing blogs right now.  And with every one I saw, I just thought “That’s too hard, too fiddly, and you need all these little bits!”.  Also I was kind of embarrassed?  But now I realise “WOMEN WEAR BRAS!  STOP BEING DUMB!”
Then my wonderful Mum saw an ad in the paper for a one-day bra-making workshop.
I gathered up three friends and we applied.  Materials and kits were to be provided, we just needed our machine. 
And this is what I made!
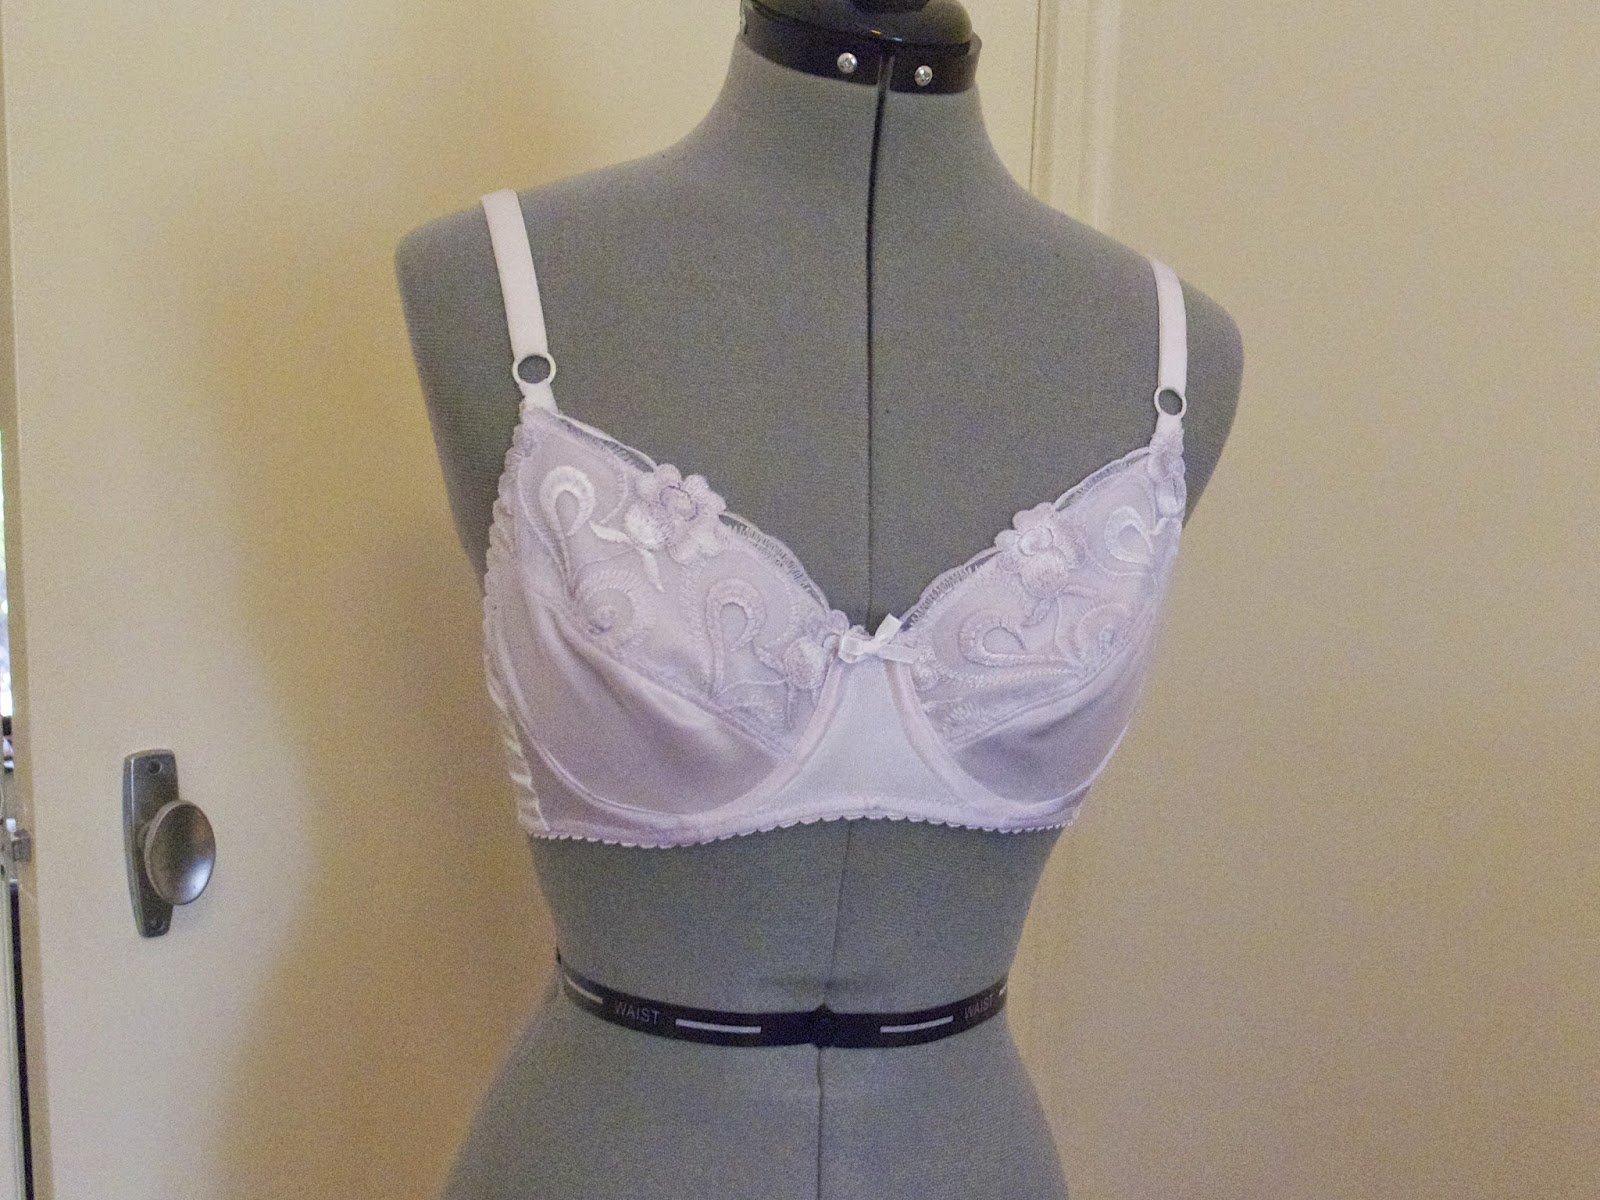
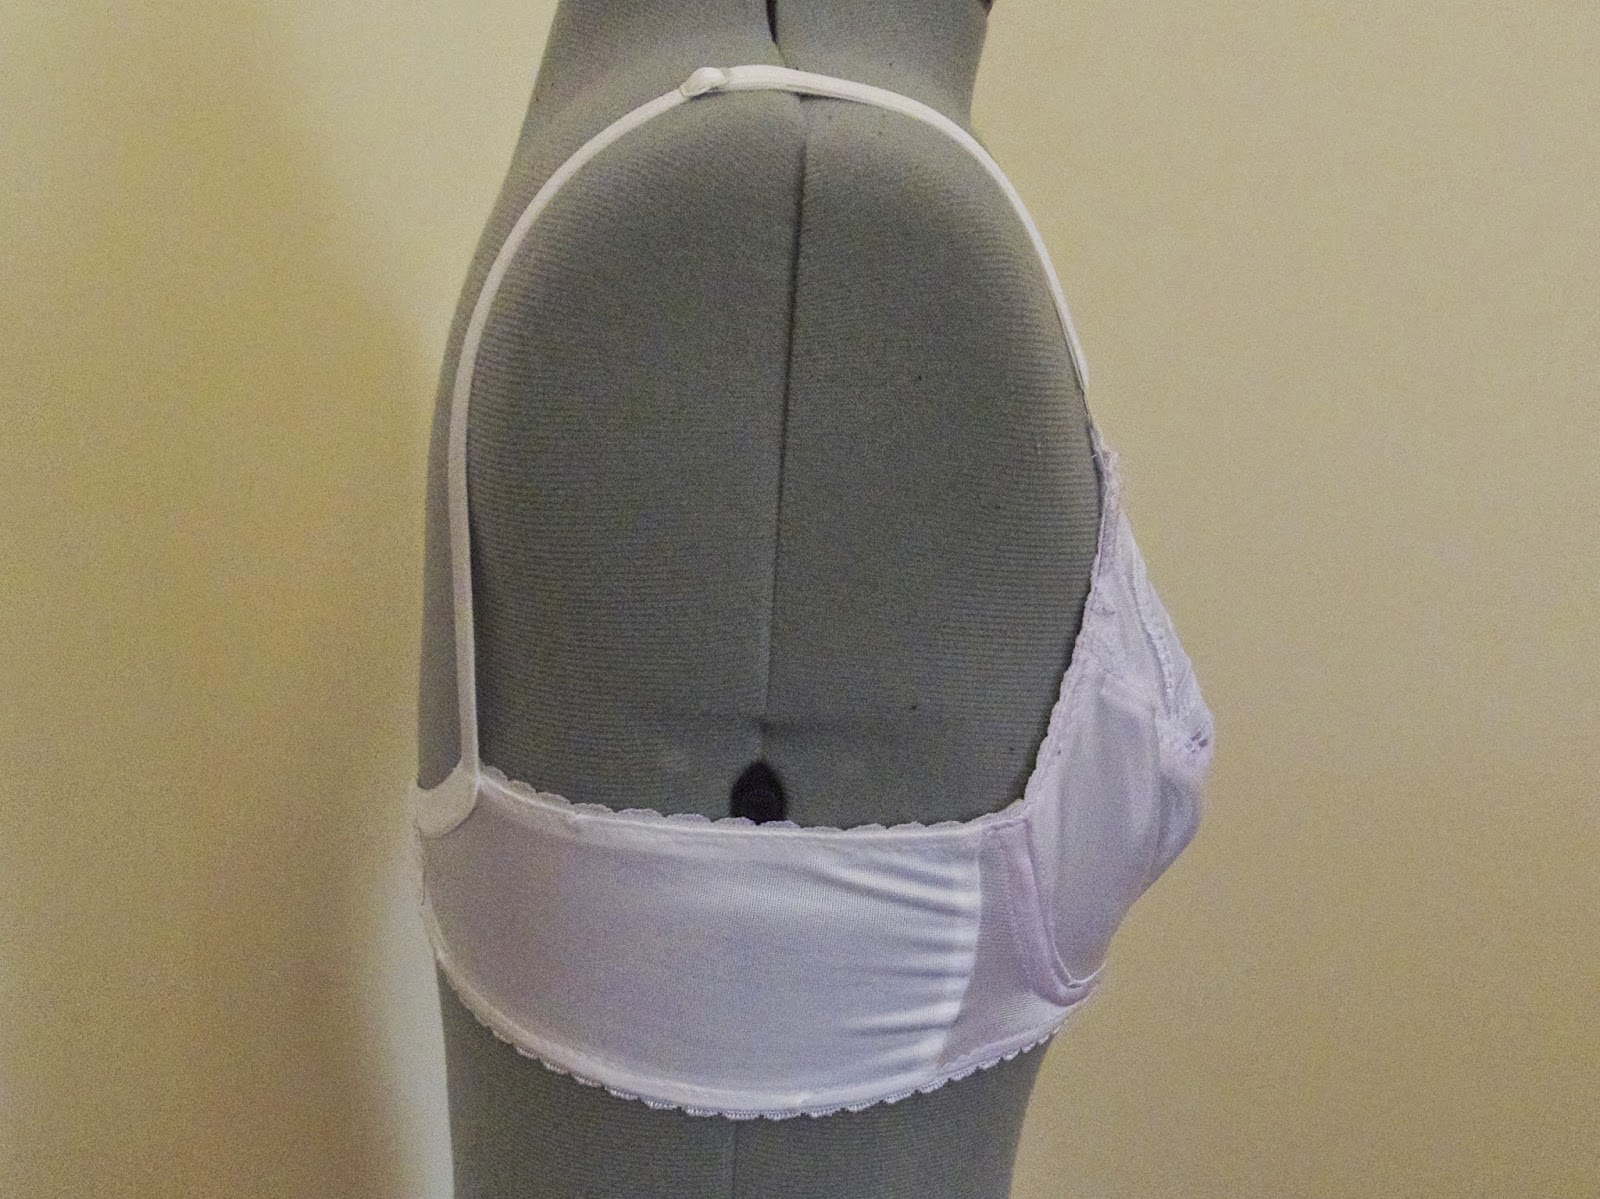
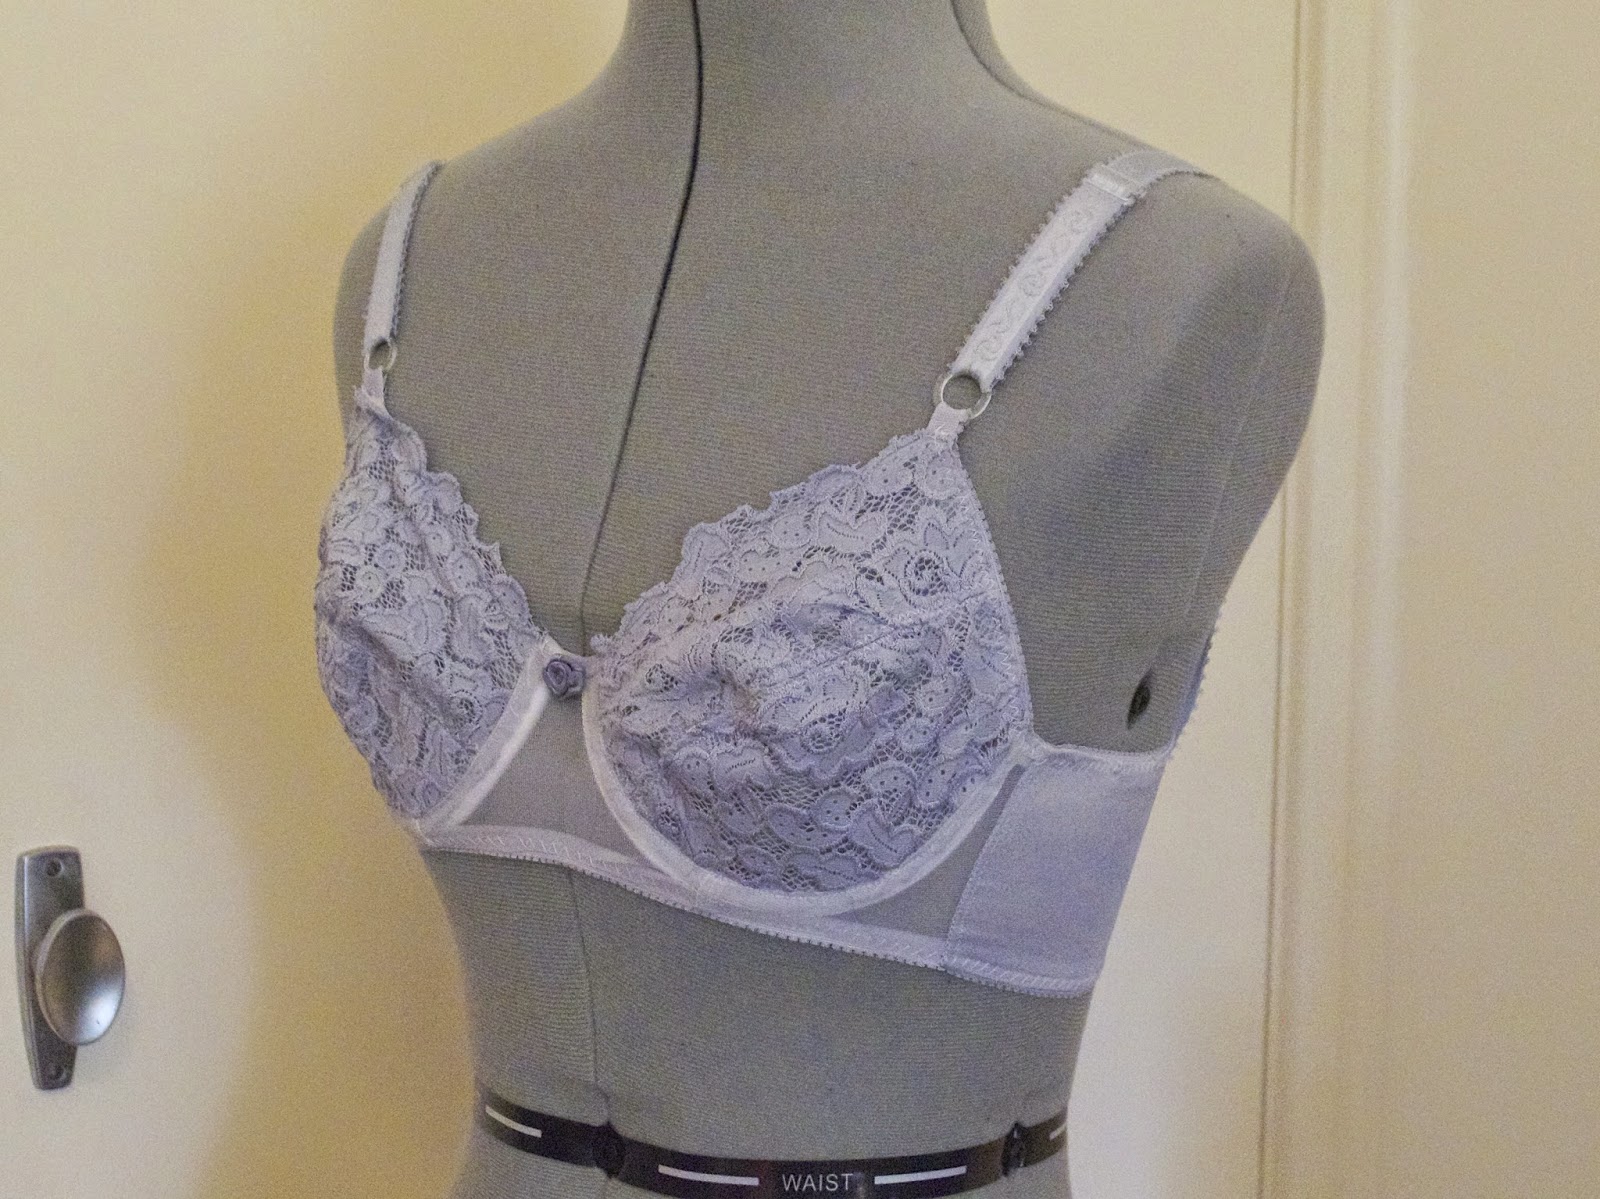
On my dressform, because, you know.  Unfortunately it doesn’t fit the dressform all that well, because she doesn’t actually have boobs – she has boob loaf.  She’s also not squishy like a human.  However, I am pleased to report that it fits ME perfectly and I’ve hardly worn anything else!
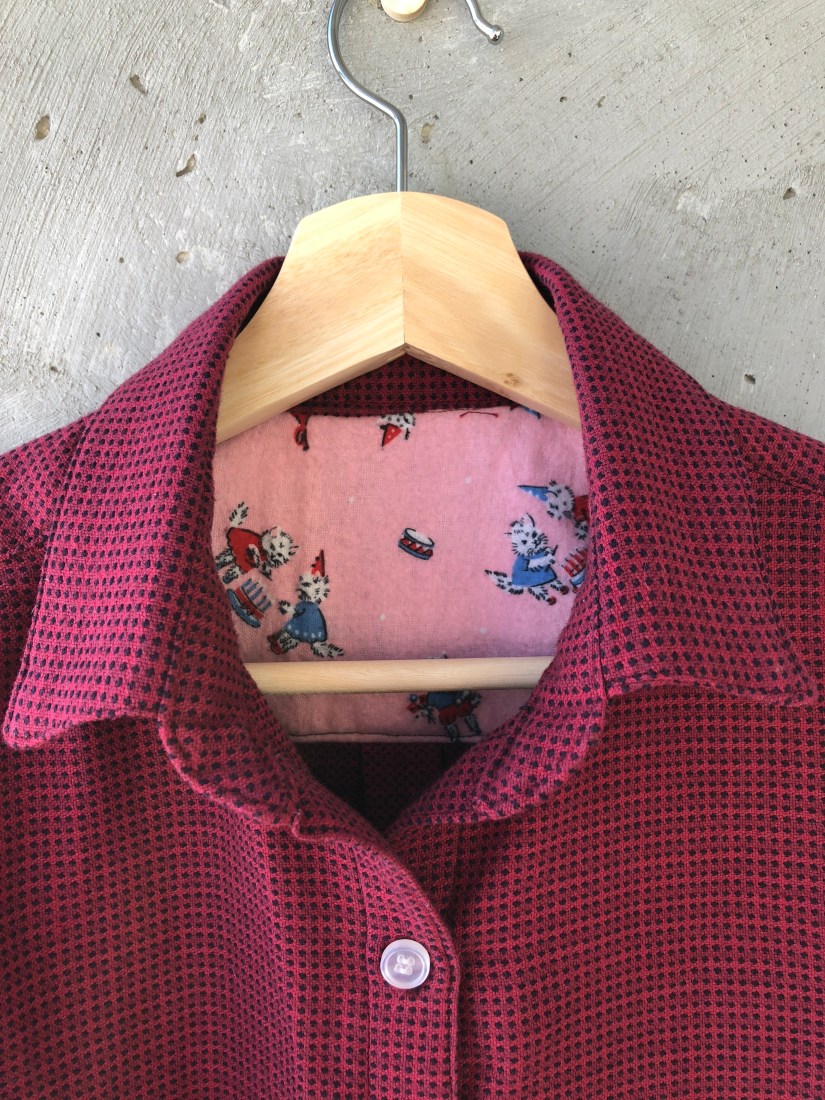
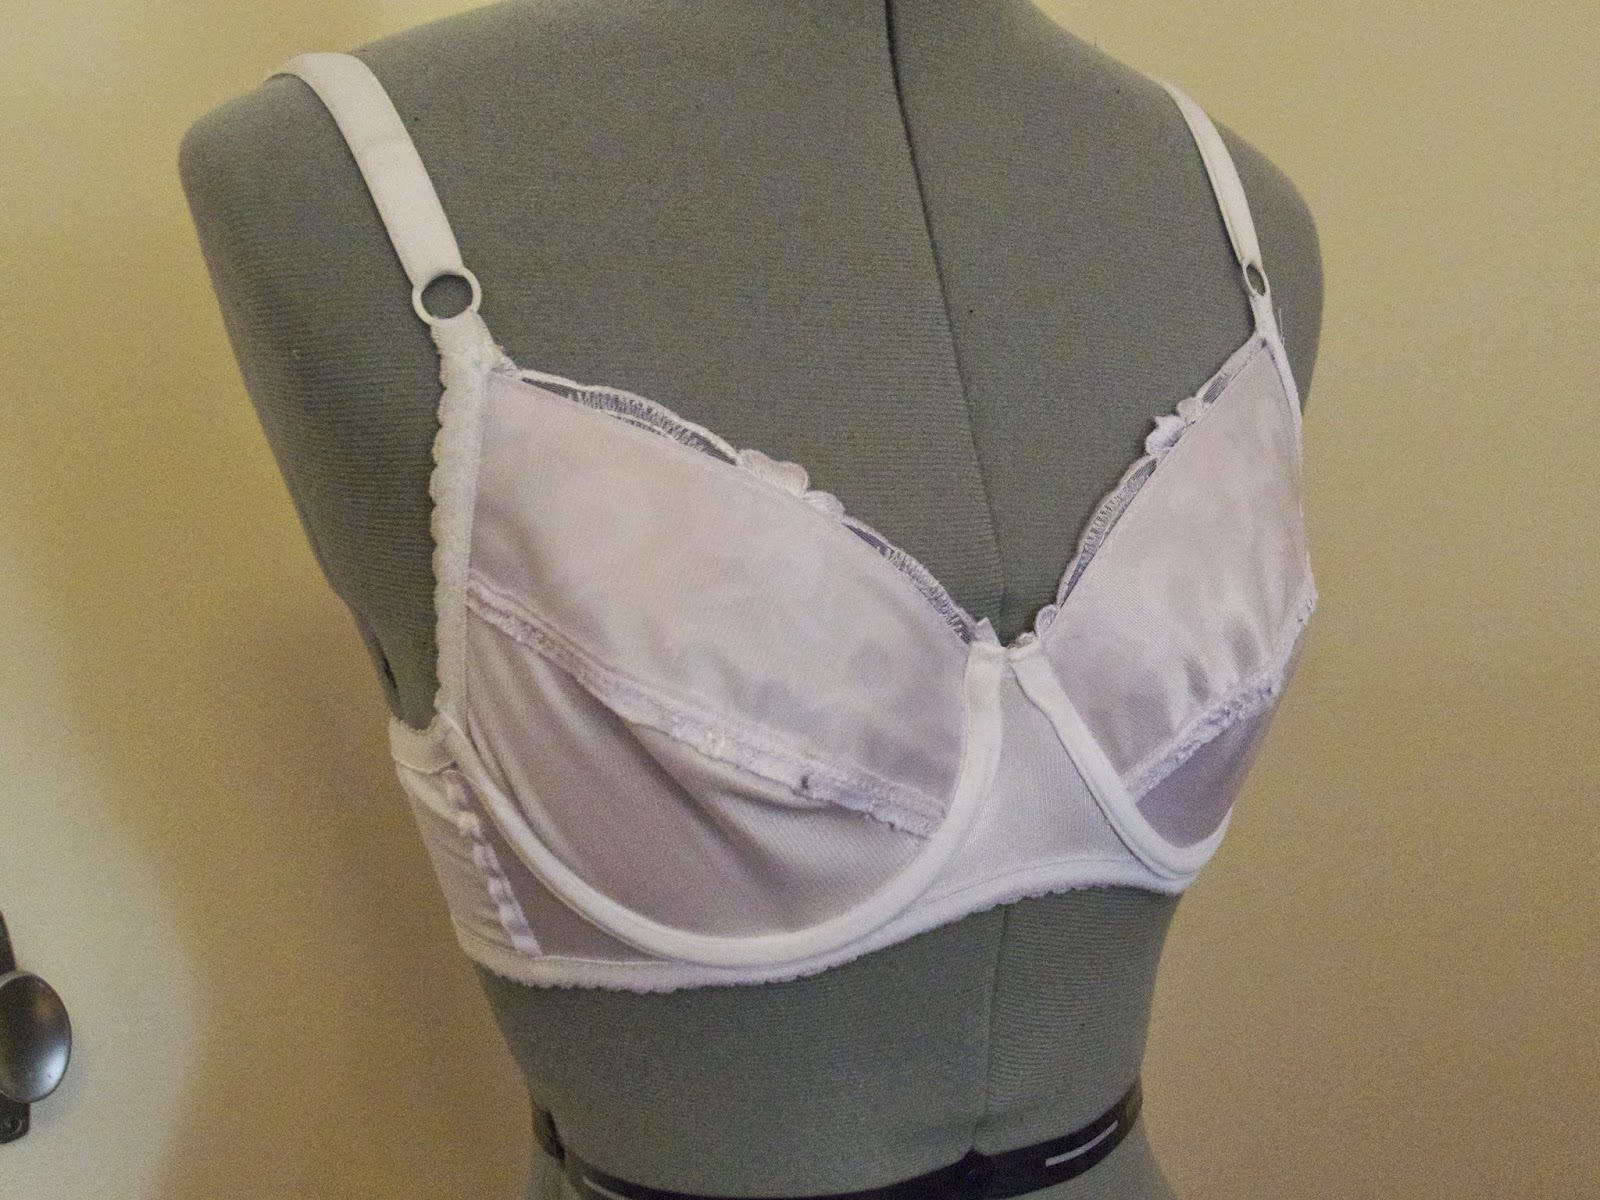
The pattern is THIS ONE, from an Australian company that is hilariously named Booby Traps.  It’s a soft-cup bra, no padding or moulded cups.  I know the pattern photo is pretty dreadful – why didn’t they make sure the bra was fitting the model properly?  But it’s a great pattern that worked really well for me and all my friends.  It looks pretty similar to the Malborough bra Lauren of Lladybird made HERE.
I made a size 10B which is my usual size in the shops.  The fabrics are tricot, lace, and some thick elastic fabric I forget the name of.  The lace is just decoration and was tacked onto the tricot before construction. Other materials are two rings, two sliders, underwires, a casing for the  underwires, strapping, elastic for the bottom edge, hooks and eyes, and a tiny bow to sew on the centre front to hide any messy stitching there.  It’s a lot of extra bits.  You can get them at Lincraft or other craft stores (I guess bra making is more common than I thought).  I’m planning on deconstructing some bras I don’t like so I can make some more with the notions.
Construction was a bit fiddly because it’s just so small compared to the long straight seams I usually like doing!  First, sew the upper cup to lower cup.  Then sew the frame together (back to side to middle to side to back).  Then sew the cups into the frame.  Then sew the elastic along the bottom.  Then sew the underwire casing to the frame (not the cup!).  Then the underarm elastic.  Then the rings and straps.  It’s fiddly.
Here’s a photo of the bra inside out so you can see some of the inside workings.  The seam in the middle of the cups could be irritating to sensitive people but mine is fine.  I just sewed the seam allowance down close to the edge.  It’s not like it rubs, bras are supposed to stay put!

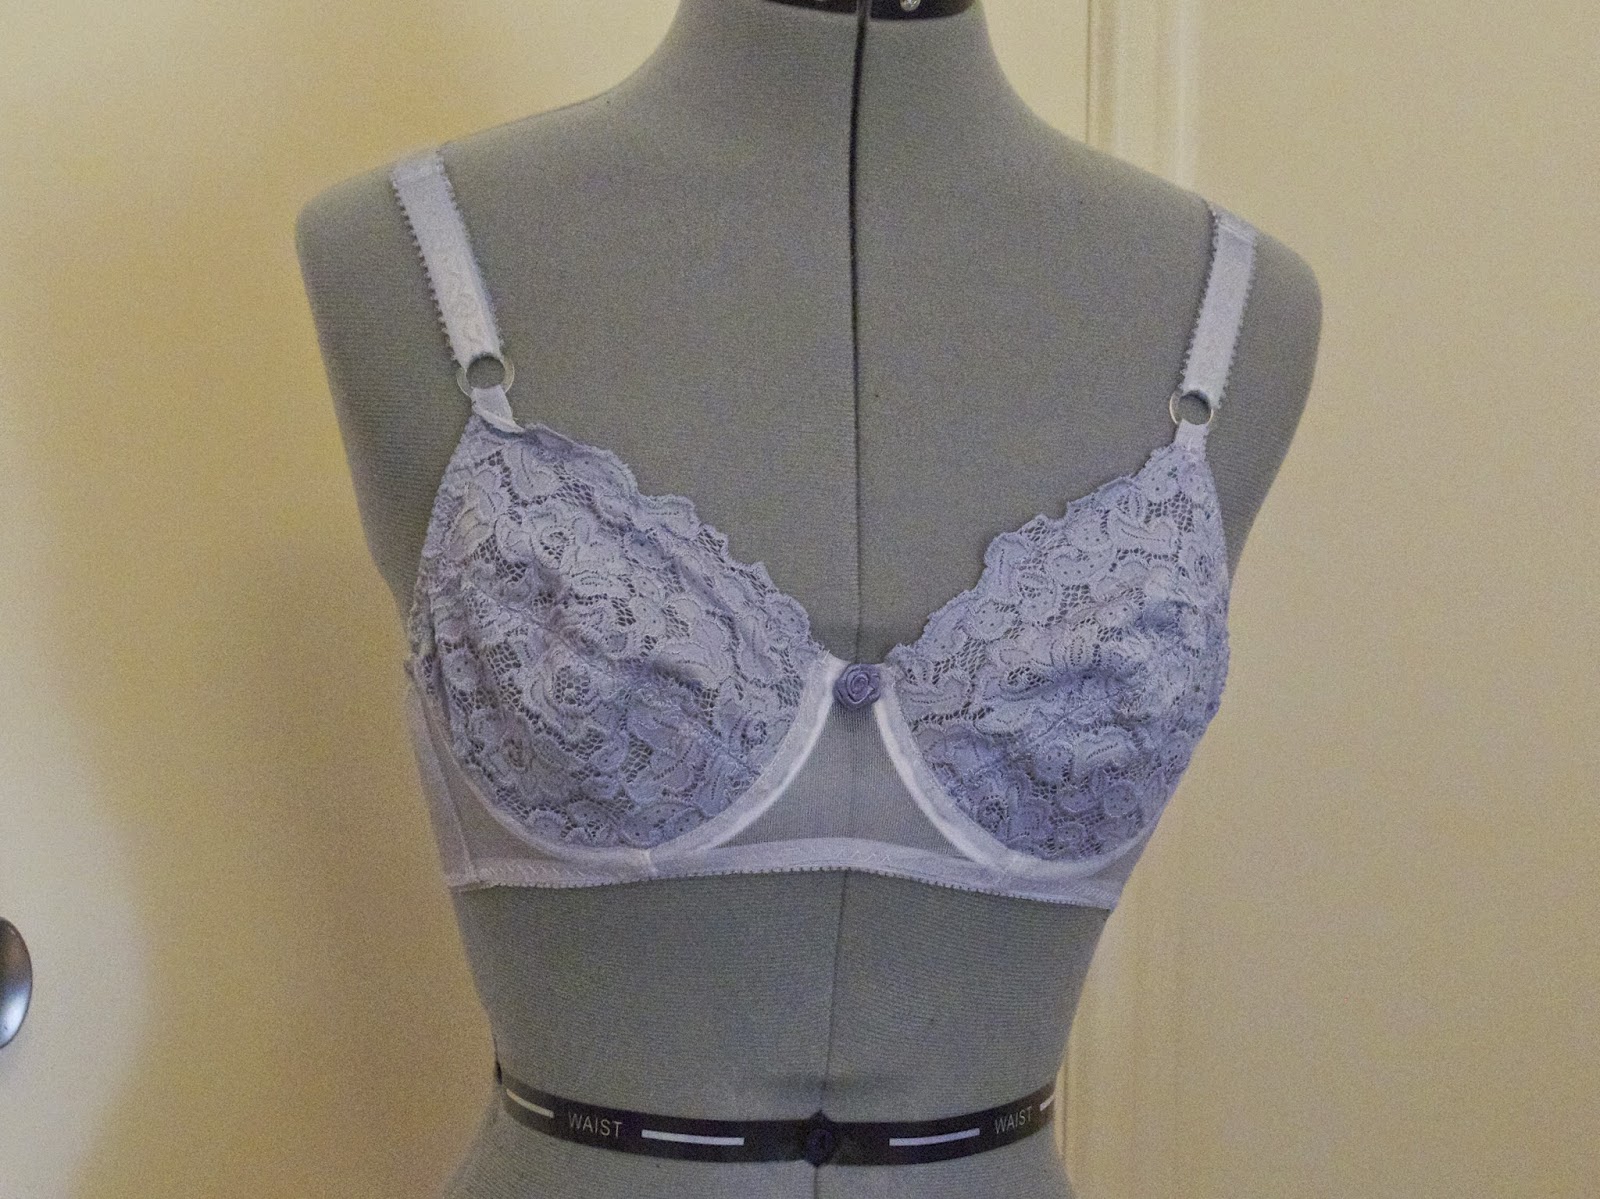
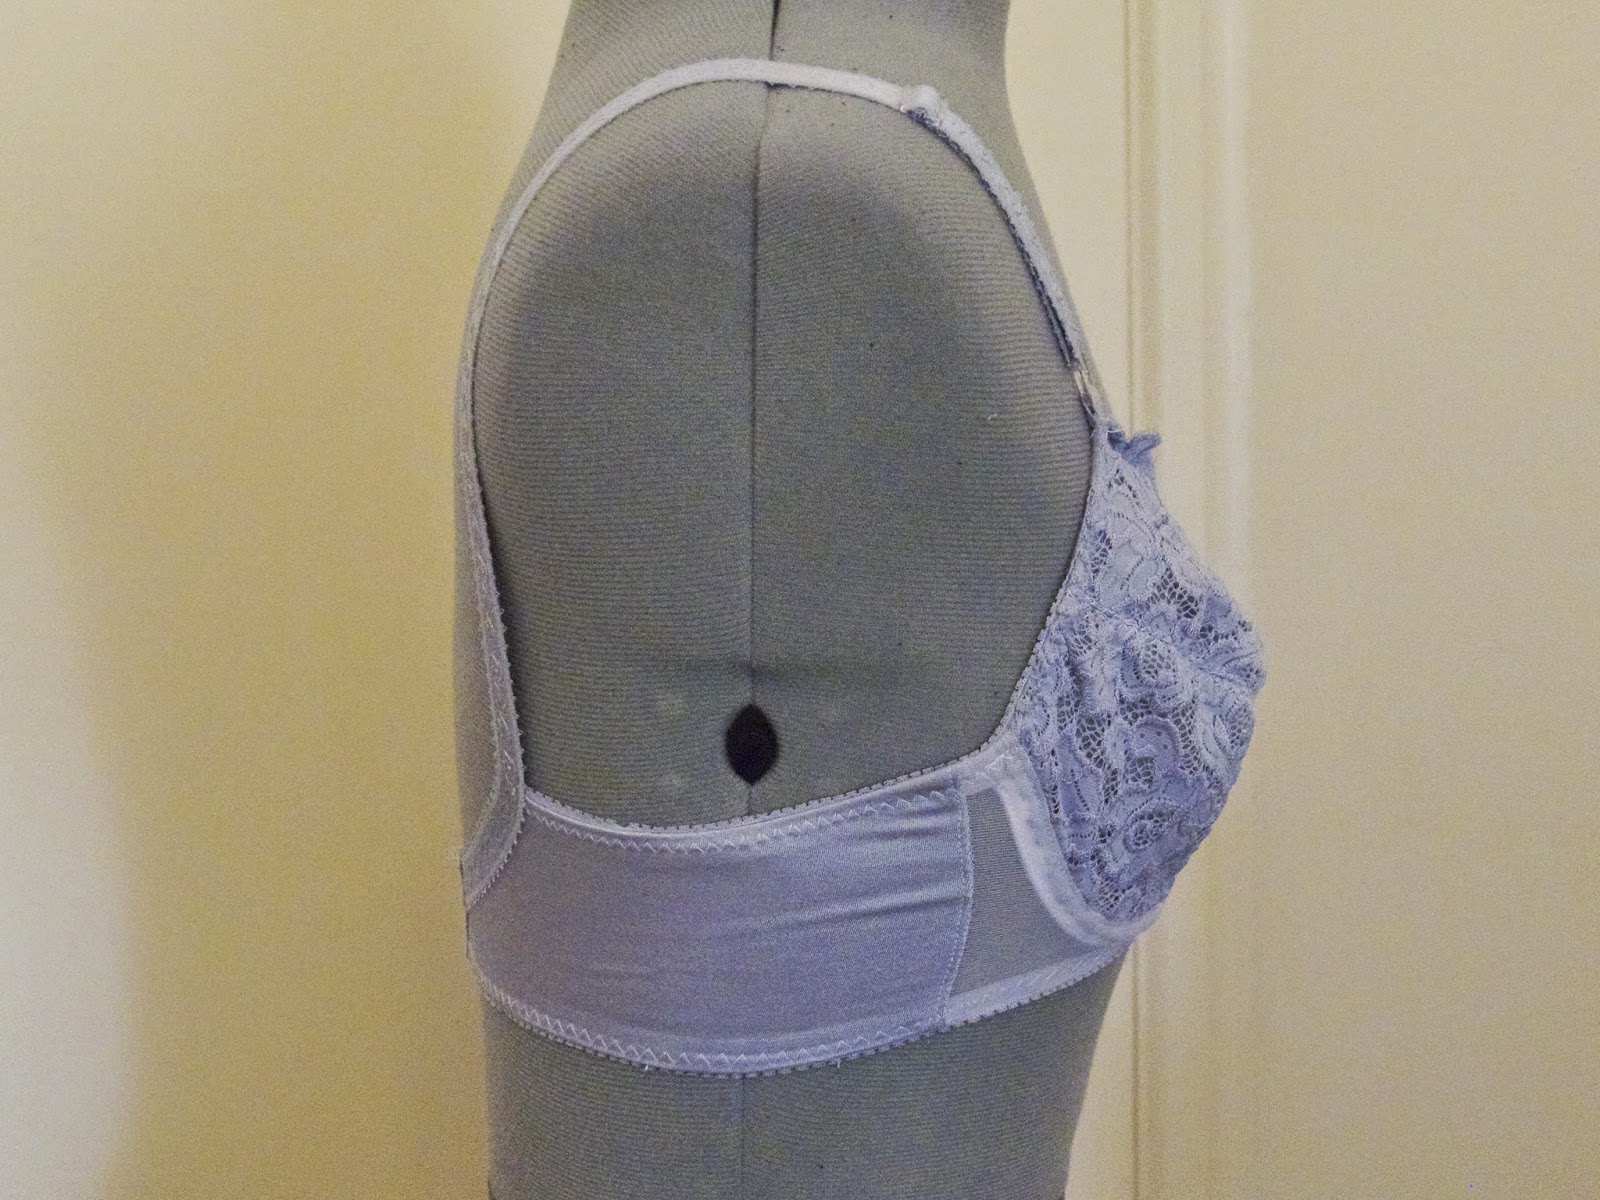
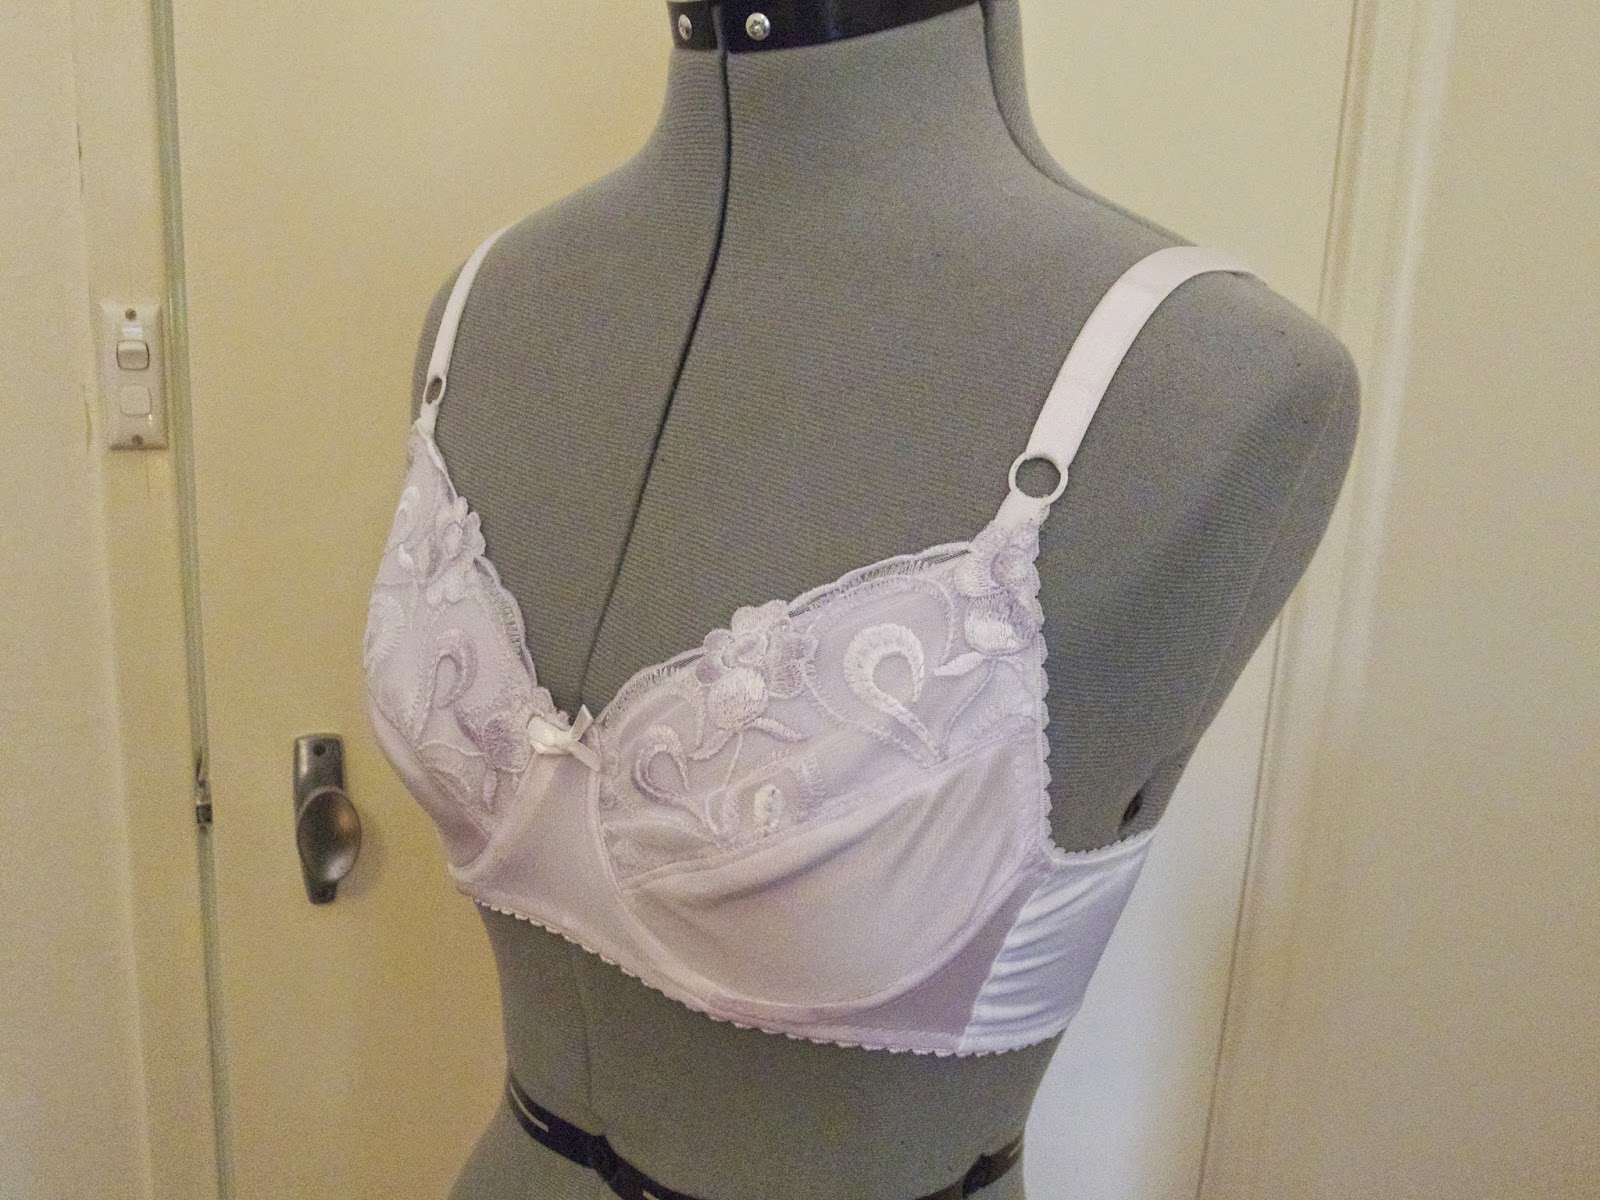
Here is the one I made at home from the kit:
The tricot mesh that came with this kit was much much thinner than the one we used at the workshop, which meant I had to put lace on the upper and lower bra cups (for modesty).  You can see at the front the dressform’s grey skin is showing!  So obviously I had to put lace on it!

The lace is tacked onto the lining pieces before seaming, which can be quite fiddly.  But because this particular lace is so busy, you don’t see the seamline at all!


 The lace was also quite stretchy and the lining extremely firm so I have some bumps in places.  This one seems to be a bit tighter as a result of the fabric being less stretchy. But it fits and I remembered how to do it!  On my own it took about 3 or 4 hours, and in the class it took 6. So I’m getting quicker!

On the Booby Traps website you can also buy kits with the fabric and notions provided.   There are some really cute kits on that website!  The one I bought (I got it at the workshop and can’t find it online) is a pretty soft blue but next I’m thinking of THIS one… 
 or THIS one… or THIS one… Booby Traps also sells a bunch of ready-to-wear lingerie… but we’re not into that right?  It’s all about the DIY!
So I’m totally converted!  I’m immensely proud of myself for making something so fiddly. I’m going to start making ones from stash fabric and see how that turns out!
jacket, sewing

Completed – Jacket!!

Things have been a bit quiet here on the ol’ blog.  I apologise!  Work and husband stuff has been taking up my life.  Husband stuff is not what you’d think, it’s actually us doing a whole lot of performances and work for his studies.  It’s fun and I’d never say no, but it takes time.
So!  Here’s the jacket I made last term (!) for my course at CIT.  I am really happy with it, and wow I even passed the course!
I’m afraid that’s the best photo there is.  
The pattern is Vogue 8701, which also has a really nice dress pattern.  Might get onto that soon too!
No buttons, just pinned at CIT.
The fabric is a wool tweed I found at a St Vinnie’s in Braidwood.  The places you find things!
The lining is a silk/cotton from Spoonflower, which has small screw heads as the print!
Cute back pleat detail.
So yes!  I’m loving this new jacket.  It’s wonderfully warm and structured.  It took me a loooong time to complete, as it’s so detailed and difficult, but it was worth the effort.  I have some lovely dark brown wool to make a second version now too!!
In one of my recent Craft Catchup videos I looked at this jacket in detail.  Worth a look if you’re interested in jackets!!
craft, craft catchup, sewing, vlog, youtube

New venture – Christina’s Craft Catchup on youtube!

I’ve been a bit silent on the blog for a while… but that doesn’t mean I haven’t been making things!
So… I’ve made some vlogs!  I call them “Christina’s Craft Catchup” because I’m catching you up on all the crafts I’ve been doing!  Mostly knitting and sewing honestly, but some other things will be included too.  My channel is called Christina’s Craft. 
I’m planning to record vlogs every Friday, but it’s been a bit less frequent than that so far – just because of work and being away etc. Hopefully I can get into a better routine!

Craft Catchup no. 1


In this vlog I talked about my new “Shilshole” hoodie; a bunch of underpants (for me AND Charles); and my plans to make a shirt, a dress, and knit a cardigan:

Craft Catchup no. 2
In this vlog, I talked about my new Marion cardigan; Lady Skater Dress; and blouse; and discussed my plans to make a fair isle jumper, another dress, and bath bombs.

Craft Catchup no. 3

This one was a bit shorter as I’d started back at work and had less time to craft.  I talked about my new fair isle jumper of my own design, my bath bombs, and some vintage knitting patterns I’m going to try.

I find it quite hard to watch these because I’ve never listened to my voice before!  It’s the worst!  So it’s quite embarrassing to film and edit.  But we’ll see how it goes the first few times and if it’s good, I’ll continue!

Constructive criticism welcome!

charles, pyjamas, sewing

Pyjamas for Charles!

This is a bit late coming, but look!  I made Charles some pyjamas!
On The Great British Sewing Bee episode about patterned fabric, all the contestants had to make mens pyjamas out of a patterned fabric of their choice.  After watching that, Charles demanded a set for himself!  This is the pattern I chose, Kwik Sew K2388.
Simple button down shirt with a revere collar and piping, and regular elastic waist pants.  I omitted the pocket and the piping on the pants, as well as the drawstring (it’s only decorative anyway… although now Charles has to look really hard to figure out which way is the front).
And the result (a bit rumpled as he just got out of bed)…
A roaring success!  I used navy spotted cotton, which is quite crisp and not what you’d usually use for pyjamas.  Charles didn’t want flannelette as it’s too warm for him.  I came across some problems with the fabric as it was super narrow.  I needed much more metreage because the pieces wouldn’t all fit across the fabric like in the suggested marker.  I also had to add a bit on to the end of the pants, but you can’t see unless you know about it!
This was my first time doing piping and I think it turned out ok!  Luckily the seam allowance is only 6mm, which was the same width I needed to sew the piping on correctly.
Piping!  Woo!
I made the set in the size small, with the length of the size L.  Charles is a tall dude!
He loves them and wears them all the time, so we’re both happy 🙂