diy

How to make bath bombs!

I love bath bombs!  I used to spend a bunch of money on fancy ones from Lush (which are super amazing) but soon realised that the ingredients are things that I have at home.  After a bit of research and trial and error, here is my method for making lovely fizzy smelly bath bombs – easily!
First, here’s what you’ll need.
Bi-carb soda (sodium bicarbonate)
Citric acid
Food dye
Epsom salts
Scented oil – essential oil, massage oil, food flavouring oil.  I found some vanilla-scented massage oil.  Make sure it can be used on the skin. If you don’t want a scent use olive oil.
Cookie cutters
Mixing bowl and mixing device (like a spoon or whisk)
Glad wrap
Epsom salts are supposed to be good for your muscles when you soak in a bath.  I don’t know why. 
You need two parts bi-carb soda, and one part of each epsom salts and citric acid.  Since the citric acid comes in a little container I use that to measure out the rest.

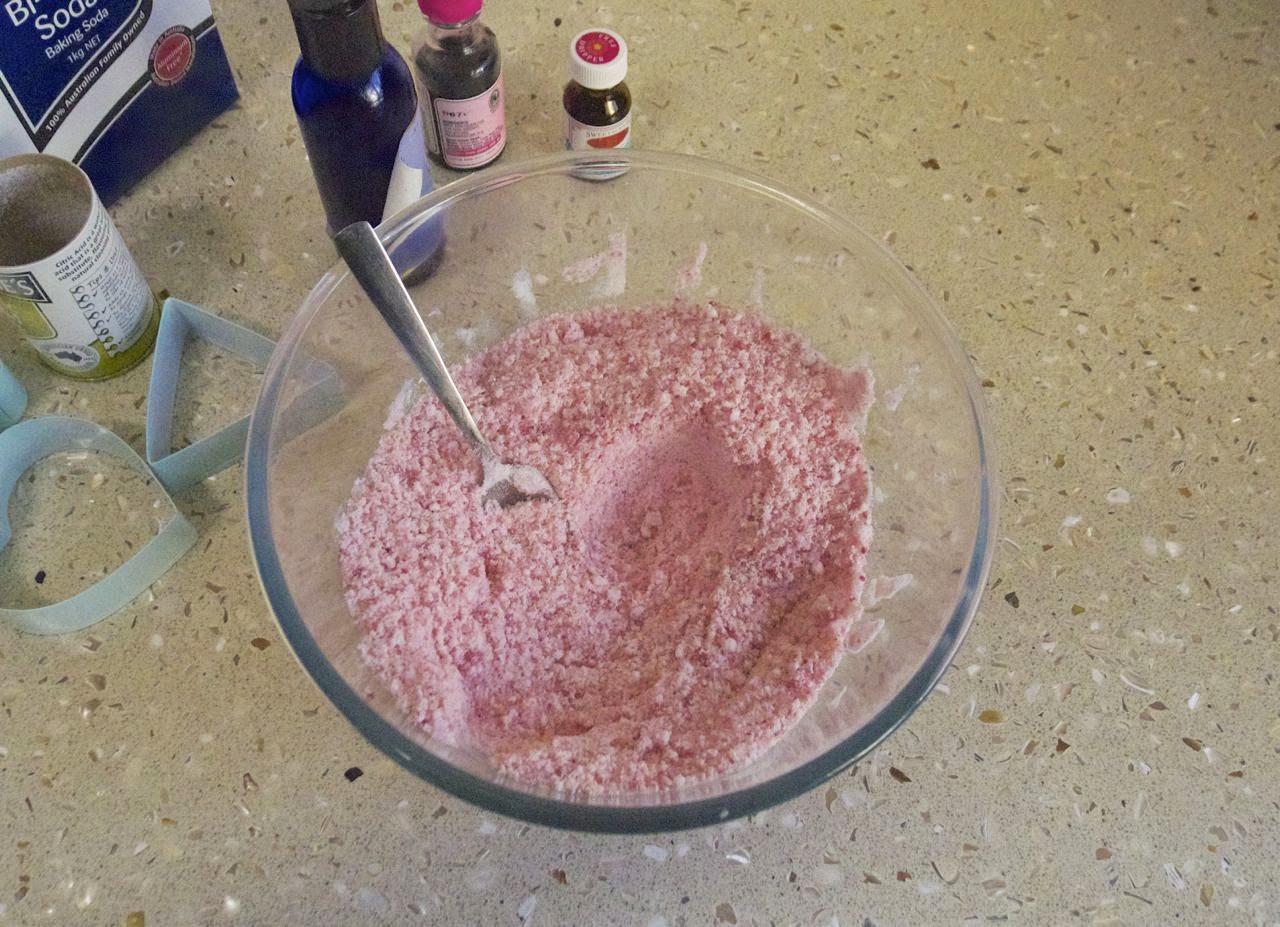
First, add the epsom salts to a bowl and add your food dye.  Make sure you do this FIRST, since if you add food dye to the whole dry mixture it’ll fizz.  
Colours I recommend: Pink, Blue, Purple, Green.
Colours I don’t recommend: Yellow, red.  Just because it’ll seem like you weed or bled in the bath.

Now add the citric acid and bi-carb and mix around!

Now you have a dry mixture that’s pretty and colourful.  Now you can add your oil.  The oil is not only the scent but also is the sticking agent, so add enough that you can make a shape with the mixture when you squeeze it – but not too much.  Because it’s oil and not water, it won’t fizz!

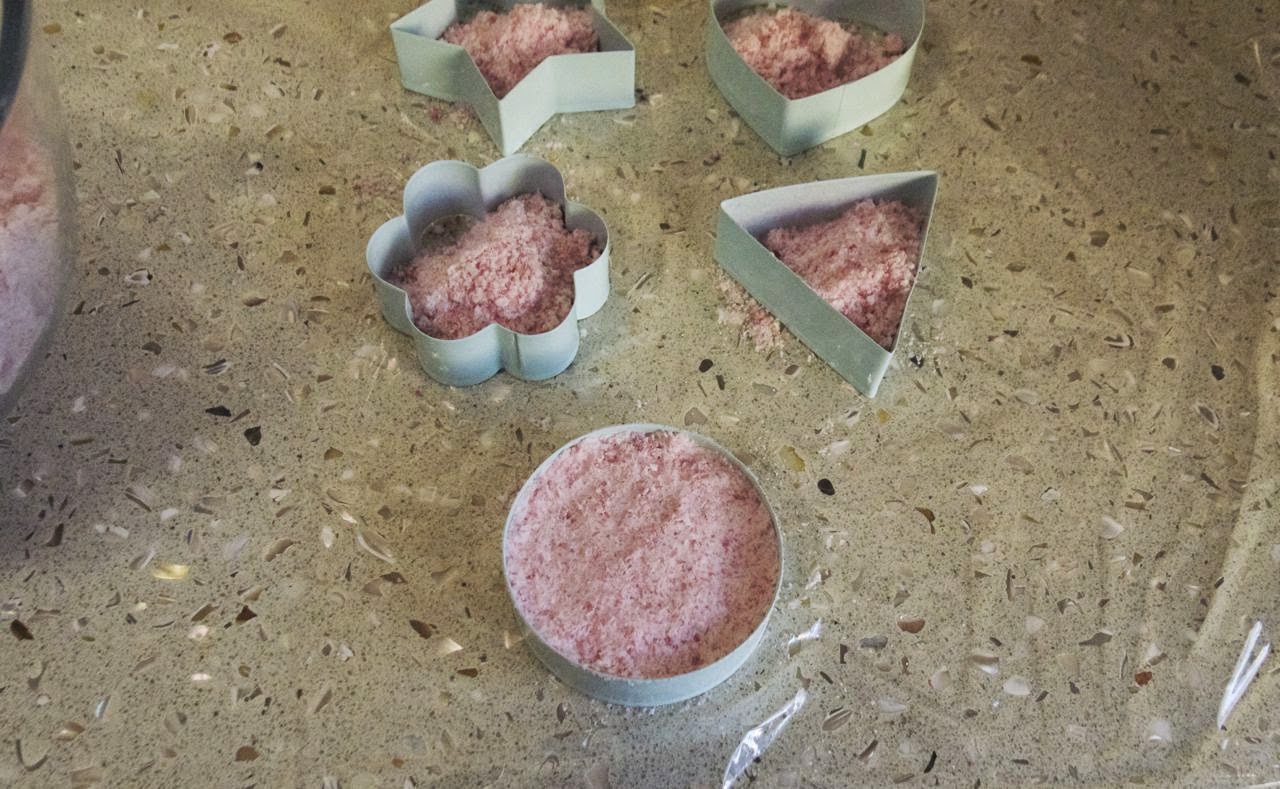
Lay out your glad wrap and put your cookie cutters on top.  Start spooning the mixture in and squish them down as hard as you can.  The more you squish the mixture the longer it’ll fizz in the bath!
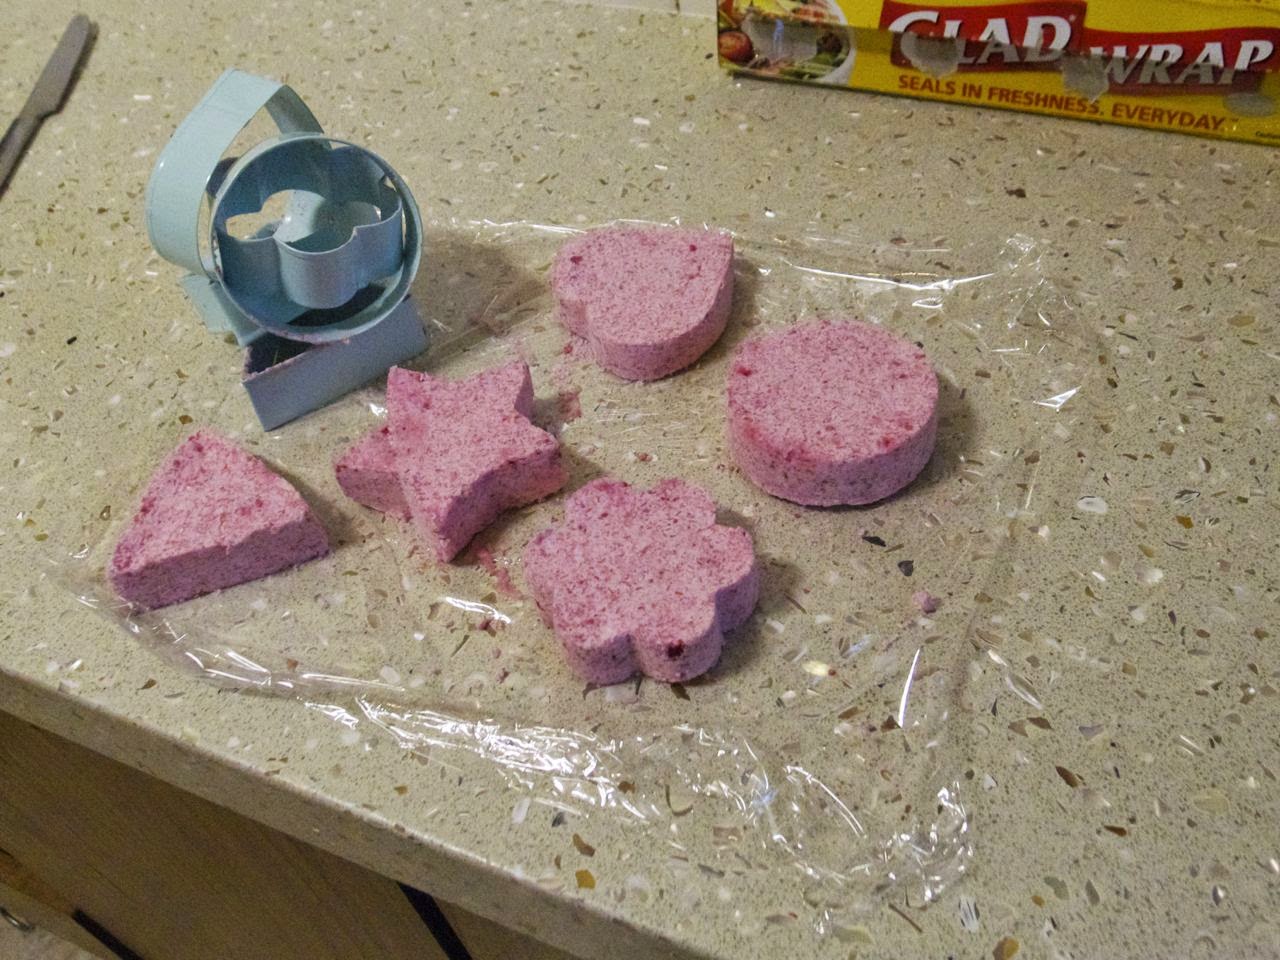
Leave them in their moulds for a while and then gently push them out.  Leave them to dry for a day or so.  Make sure you don’t pile them together or you’ll end up with one giant massive bath bomb!  They will FUSE.
Enjoy your fizzy pretty aromatic bath!  
diy, frocktober

Tuesday, Frocktober the 1st! Hand-dyed sundress.

Today on the first day of Frocktober, I’m wearing a very old dress from Tree of Life that I dyed yesterday!  Here’s a link to my last Frocktober when I wore it.
 This is the dress before I dyed it.  Very faded in weird patterns!  The skirt was white with interesting yellow, purple, red, and black patterns.

 I used some Rit dye I got an Lincraft to dye my very faded patchy dress a nice strong wine colour!

The Rit dye is a powder which you put into hot water and then soak your fabric for 30 minutes.  I also added a white singlet top that has been getting discoloured…
 Once dried this is what it looked like!  Turned out pretty nice!
 And here’s my “white” singlet top.  The only thing that didn’t take the dye at all was the polyester thread, which is annoyingly apparent.  It’s weird how the lace turned out a slightly different colour, but I guess it’s a different fibre content.
 And then I went to the op shop!  I bought the following: a KnitWit pattern for a jumper, and two stretch dresses.  They’re both too big, but that’s okay because I’m going to use them for UNDERPANTS!
How was your first day of Frocktober?  
diy, hair, haircut

How to cut your own hair straight!

Last time I cut my hair, I did a layered cut.  Tutorial here!

This time, I wanted a straight cut.  I want my hair to be like Sarah’s in Labyrinth.  Here she is:

 See how nice and straight the cut is?  No layers in that cut.

Now my hair has layers quite high up, so I’ll need to grow it out a bit before the whole thing can be straight.
Onto the tutorial!

Here I am before my haircut, all raggy daggy ends!

Brush it all out so that there are no tangles.  If you have curly hair it might be best to straighten it at this point.  Mine is straight enough so I don’t need to.

Part your hair where you normally do so it won’t be crooked when you part it later.

Put it in a ponytail at the nape of your neck, making sure there are no lumps.

Grasp the elastic and pull it downwards.  Not outwards!

Stop when you have a little ponytail at the end.  The elastic is your guide for cutting!

Snippy snip!  Straight across.

Repeat the whole process a few times to even it out.  
Here’s what mine looked like when I finished!  Straight across the back.

At the front you can still see my higher layers, but eventually it’ll be all grown out!  I’m going to keep cutting it like this so that I can have hair like Sarah’s!
diy, mask, skin

DIY Bi-carb and honey mask!

Recently I’ve been getting into face masks.  But… since I don’t like buying them from the shops, I’ve been making my own!  And I’m really excited about the results.  One in particular has been working wonders on my skin, so here I share with you the super-exfoliating bi-carb and honey face mask!

There are only three ingredients: bi-carb soda, honey, and either milk OR olive oil.


Bi-carb soda is a cleanser and also is a great exfoliant, and honey is full of goodness.  It’s apparently an anti-bacterial so will help with any acne.  The olive oil is moisturising and cleansing, and the milk is calming and soothing.  I don’t put both in because then the mixture becomes too runny, but I have tried it with both. It’s smoother if you use milk.

Mix up 1 teaspoon of honey with 1.5 teaspoons of bi-carb soda, stir it up and then add enough milk or olive oil to make it a nice paste consistency. If it is still too thick, pop it in the microwave for 12 seconds to melt the honey a bit.

Like so.


Now remember to tie your hair back!  Slap it on a clean face any old how and rub it in circular motions with your fingers.  Now leave it for about 10 – 15 minutes.
Grab a face washer and run it under hot water.  Put it on your face and just hold it there for a minute.  Now rub in circular motions again, and really exfoliate your face. You should feel the little granules working against your skin.  Just keep washing your face in this way until it’s all clean!

Classy!

This mask is quite drying, so make sure you moisturise with something delicious and luxurious. When I do this, my face always feels smooth and clean!  It also has been helping with some nasty breakouts I’ve been having. 

Let me know how you go with this lovely mask!

beauty, diy, do it yourself, hair, haircut, Home

How to cut your own hair

Today I gave my hair a bit of a trim at home.  I’ve been trimming my hair every few weeks recently to keep it healthy and nice.  The last time I went to the hairdresser was in August when I was getting married!  This haircut gives you some nice layers which are shorter at the front and longer in the back.  Here’s how you can do it yourself!

Start with straight hair – either use a straightener or do this when your hair is wet.  My hair was already straight enough for me.

 Comb all your hair forwards, making sure it’s lying flat on your head.  Comb out any knots and tangles.


 Tie your hair in a ponytail at the centre top of your forehead, right in the middle of your hairline.

 Make sure it’s tight and not bumpy.

Now tie another hair tie around your ponytail and slowly pull it down the hair, evenly.  Pull it down to just above where you want to cut.

 This acts as a guide for you and also keeps the hair all together. Snippy snip!  Cut straight across and try to make it all the same length.

 See?  Like a horse’s tail.


Now take the whole thing out and repeat these previous steps.  You’ll probably find that it’s a bit uneven when you look at it again.  

Then I like to use a comb to double check the evenness again.  Here’s where you can get a bit obsessive trying to make it completely even. My advice: know when to let go and say “it’s even!”

All done! Here’s what it looks like from the back.  You can kind of see the layers in there. It turns into a nice U-shape.

 It gives a nice shape at the front too!


All done!  My hair feels nice again!  Good luck if you try this method, I’ve been using it for a few months now and it’s super easy and effective!