beauty, makeup, review

Empties and reviews – January to June 2013!

This is my FIRST EVER empties post!  Most people have monthly empties, but I can’t seem to finish products that fast. So I’ve been saving up my empty products since the beginning of the year.  I only have 9 even after 6 months! After I took these photos, I had a great time throwing all these bottles in the recycling bin!

So, in no particular order, here are my empties!  Links to buy products are at the end.

1. Pond’s Cold Cream

Pond’s Cold Cream is the best makeup remover there is.  It is just a beautiful cream that is magic.  You do need to wash your face with a cleanser afterwards, but for makeup removing it can’t be beaten.  And I’ve tried lots of things!  Luckily my mum bought my a new tub for my birthday last week.  These tubs are huge but I certainly go through them!

2. Simple Clear Skin oil balancing exfoliating wash

This is a pretty average, normal cleanser.  The exfoliating beads didn’t do much for me, they dissolved quickly and didn’t scrub very hard.  A nice cleanser though!  I bought this because I wanted to get some pimples under control, and it does not help with that at all.  I probably won’t buy this one again.

 3. Palgantong Vita White Bb Super Cover

The first BB cream I bought.  I got this in Japan in like 2010, and it is a perfect colour match for my skin.  I’ve never had a product so exactly my colour!  The only probalo is that it makes my face look a bit powdery and dry.  I’m going to experiment with mixing this with moisturiser or a more dewy foundation.  I mostly use this for spots, and it works great. I just bought myself a new one on ebay.

4. Palmer’s Cocoa Butter formula Night Renewal Cream

This is supposed to be anti-aging, but who knows.  I just really like the product as a night time moisturiser.  It’s thick and creamy and feels nice on my face.  The smell is pretty too.  If I put a good dosage of this on at night, my face feels soft and supple in the morning. I’d totally get this again once I’m finished some other stuff.

5. Rosken Bio Serum

This is a cheap knock off of Bio Oil, and I think it’s exactly the same stuff.  Nice as a bedtime moisturiser, but if you wear it in the day it looks weird.  I’m not sure if I’ll keep going with the bio oils.  They’re supposed to reduce scarring (I have quite a bit from pimples on my forehead and around my mouth) but I can’t notice any change.

6. Natio Ageless Lifting Day Cream

I love this moisturiser!  It smells like musk sticks!  It’s a pump action bottle which is nice for hygiene but annoying because you can’t get the last bit out of the bottle.  This is a nice light cream which is absorbed pretty quickly and leaves your face feeling smooth for makeup. I love the feel and the smell.  Mmmm musk sticks.

7. Bobbi Brown Corrector in Light Bisque

My Bobbi Brown corrector is that product I can’t live without.  I don’t step out the door without it on my face.  I’m pretty sure this is my second jar, and I’m nearly done with my third already!  Love it.  My only problem is the packaging, it somehow gets bits of fluff in it.

8. Face of Australia Gentle Make-Up remover

Well this does work as a makeup remover, but it’s nothing on the Pond’s.  It’s made of two parts which you shake to mix.  This worked at removing makeup but left my face feeling dry and left with a residue.  I always washed my face after using this.

9. Garnier Roll-On Anti-Dark Circles… stuff.

I put this stuff over my Bobbi Brown to even out the skin tone.  This is more yellowish.  I can’t believe how long this tube lasted me!  I think I got it over two years ago, and used it literally every single day.

Where to buy!
1. Pond’s Cold Cream from Chemist Warehouse
2. Simple exfoliating cleanser from Ebay
3. Palgantong Vita White Bb Cream from Ebay
4. Palmer’s Cocoa Butter night cream from Amazon
5. Reskin Bio Serum at Amazon
6. Natio Ageless Lifting Day Cream from Beauty Heaven
7. Bobbi Brown Corrector from Bobbi Brown
8. Face of Australia Makeup remover from Priceline
9. Gariner Anti-Dark Circles Roll-On  on Amazon

beauty, diy, do it yourself, hair, haircut, Home

How to cut your own hair

Today I gave my hair a bit of a trim at home.  I’ve been trimming my hair every few weeks recently to keep it healthy and nice.  The last time I went to the hairdresser was in August when I was getting married!  This haircut gives you some nice layers which are shorter at the front and longer in the back.  Here’s how you can do it yourself!

Start with straight hair – either use a straightener or do this when your hair is wet.  My hair was already straight enough for me.

 Comb all your hair forwards, making sure it’s lying flat on your head.  Comb out any knots and tangles.


 Tie your hair in a ponytail at the centre top of your forehead, right in the middle of your hairline.

 Make sure it’s tight and not bumpy.

Now tie another hair tie around your ponytail and slowly pull it down the hair, evenly.  Pull it down to just above where you want to cut.

 This acts as a guide for you and also keeps the hair all together. Snippy snip!  Cut straight across and try to make it all the same length.

 See?  Like a horse’s tail.


Now take the whole thing out and repeat these previous steps.  You’ll probably find that it’s a bit uneven when you look at it again.  

Then I like to use a comb to double check the evenness again.  Here’s where you can get a bit obsessive trying to make it completely even. My advice: know when to let go and say “it’s even!”

All done! Here’s what it looks like from the back.  You can kind of see the layers in there. It turns into a nice U-shape.

 It gives a nice shape at the front too!


All done!  My hair feels nice again!  Good luck if you try this method, I’ve been using it for a few months now and it’s super easy and effective!

beauty, diy, hair

Pretty pink and blue hair using pastels

I’ve been experimenting with using chalk pastels to temporarily colour my hair.  A few other tutorials suggest you use special hair chalk, which I think you can only buy over in America.  But I bought some pretty art pastels at the art shop for literally $1.70 each, and they work pretty well!

Warning!
This stuff DOES DAMAGE YOUR HAIR, especially if you don’t take the proper precautions I suggest in this tutorial.  Any kind of chalk is drying and will make your hair a bit stiff and weird.  Proceed with caution!  Please don’t do this every week!

Let the tutorial commence.

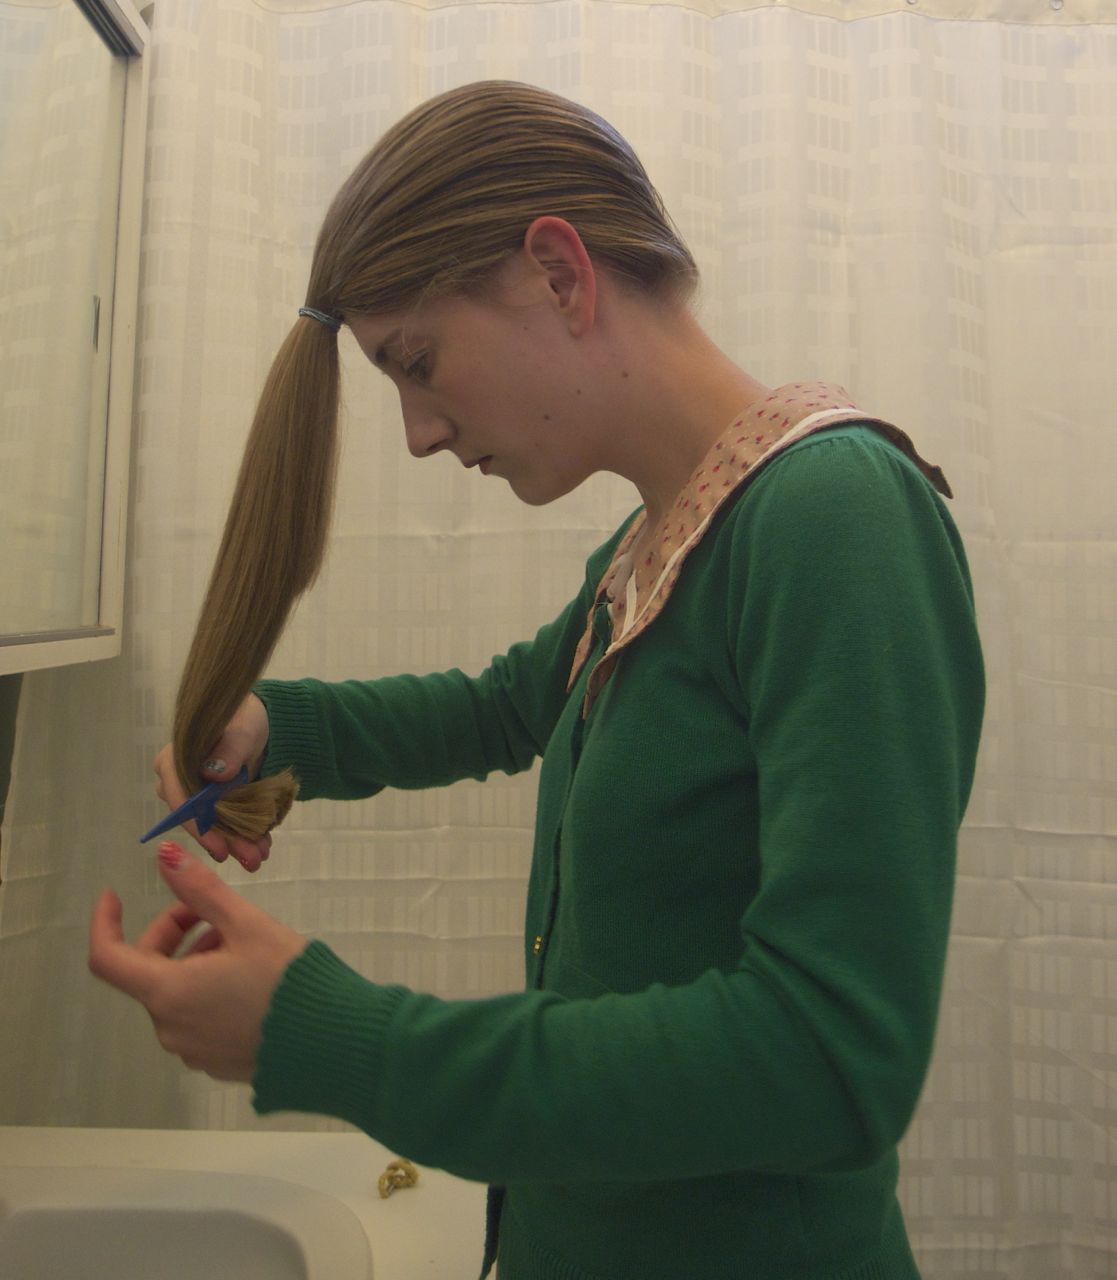
Start with clean hair.  Comb your hair through, make it nice and neat, and style it in your usual way.  I’m always side-parted.

Next, put some moisturising stuff on your hair.  I’m using Schwartzkopf Hair Elixr or something.  It’s really pretty and makes my hair silky.  It’s a kind of oil.  This is super important. 

These are the pastels I’m using!  Make sure you don’t get oil pastels!  You can tell if it’s chalk pastels because it comes off on your hands easily in a kind of dust.  Oil pastels feel… oily.

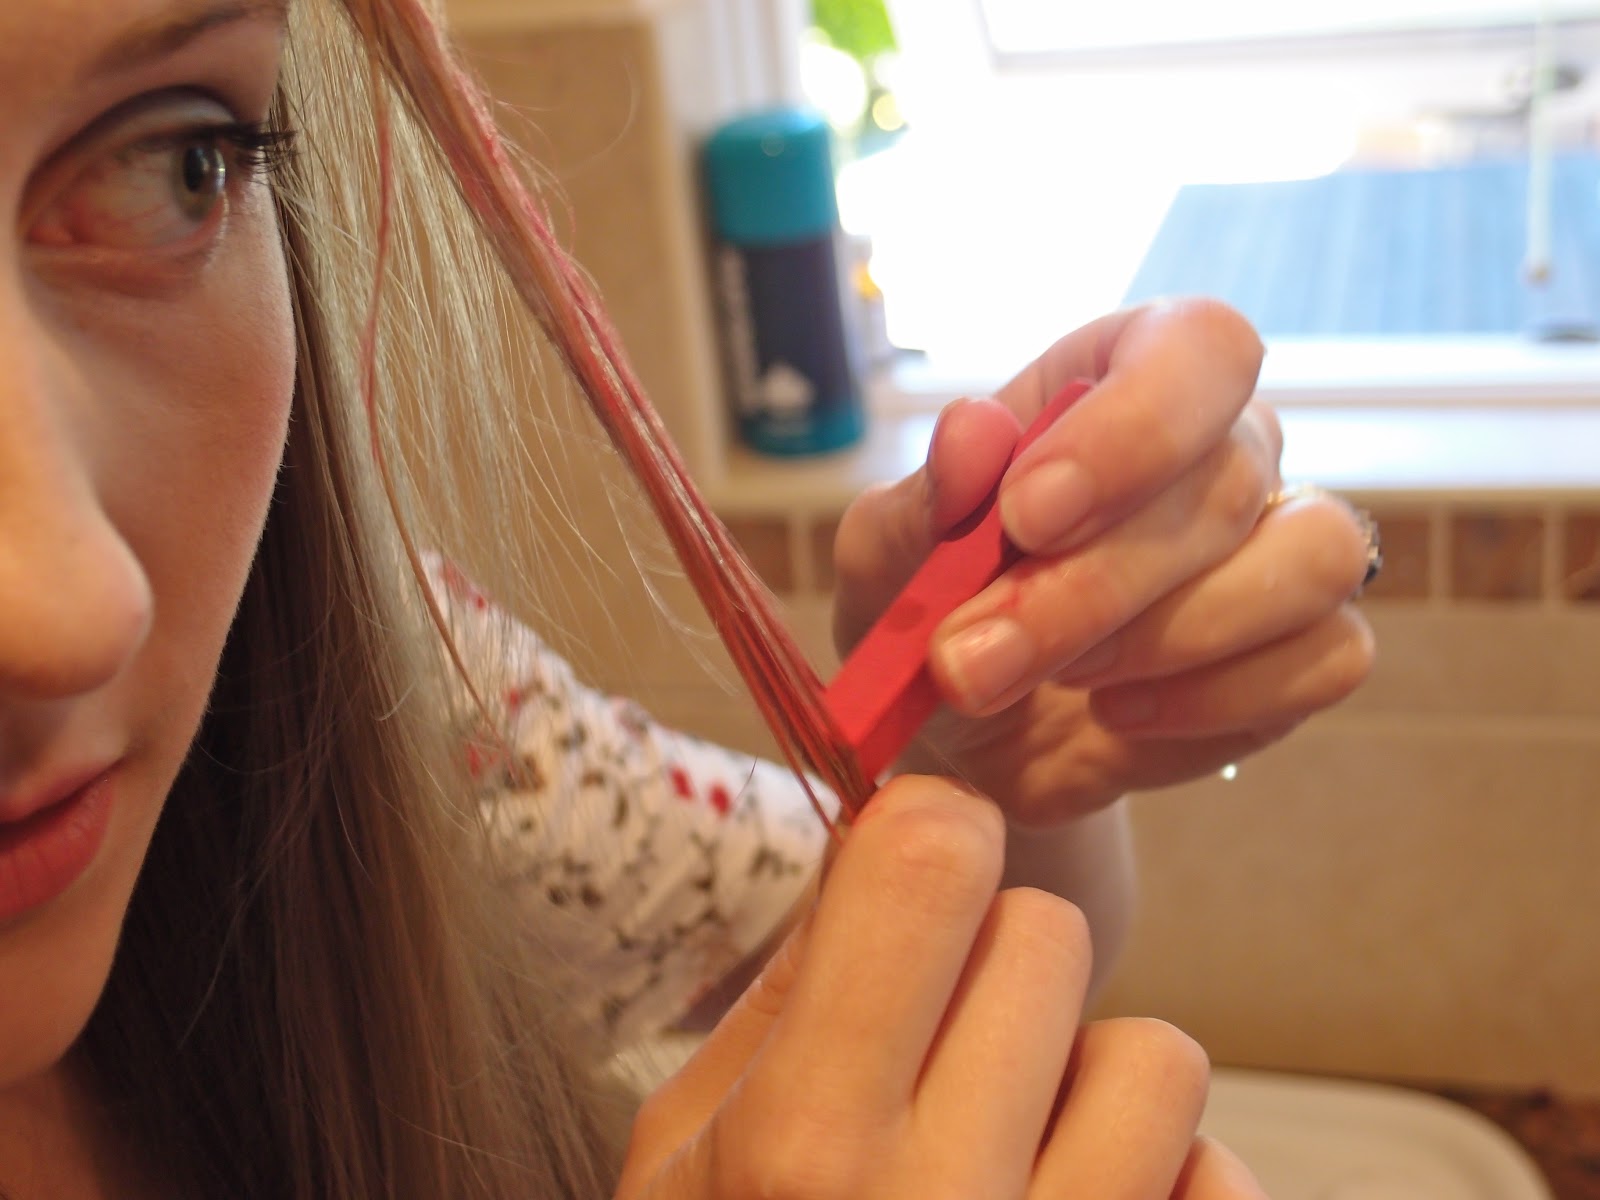
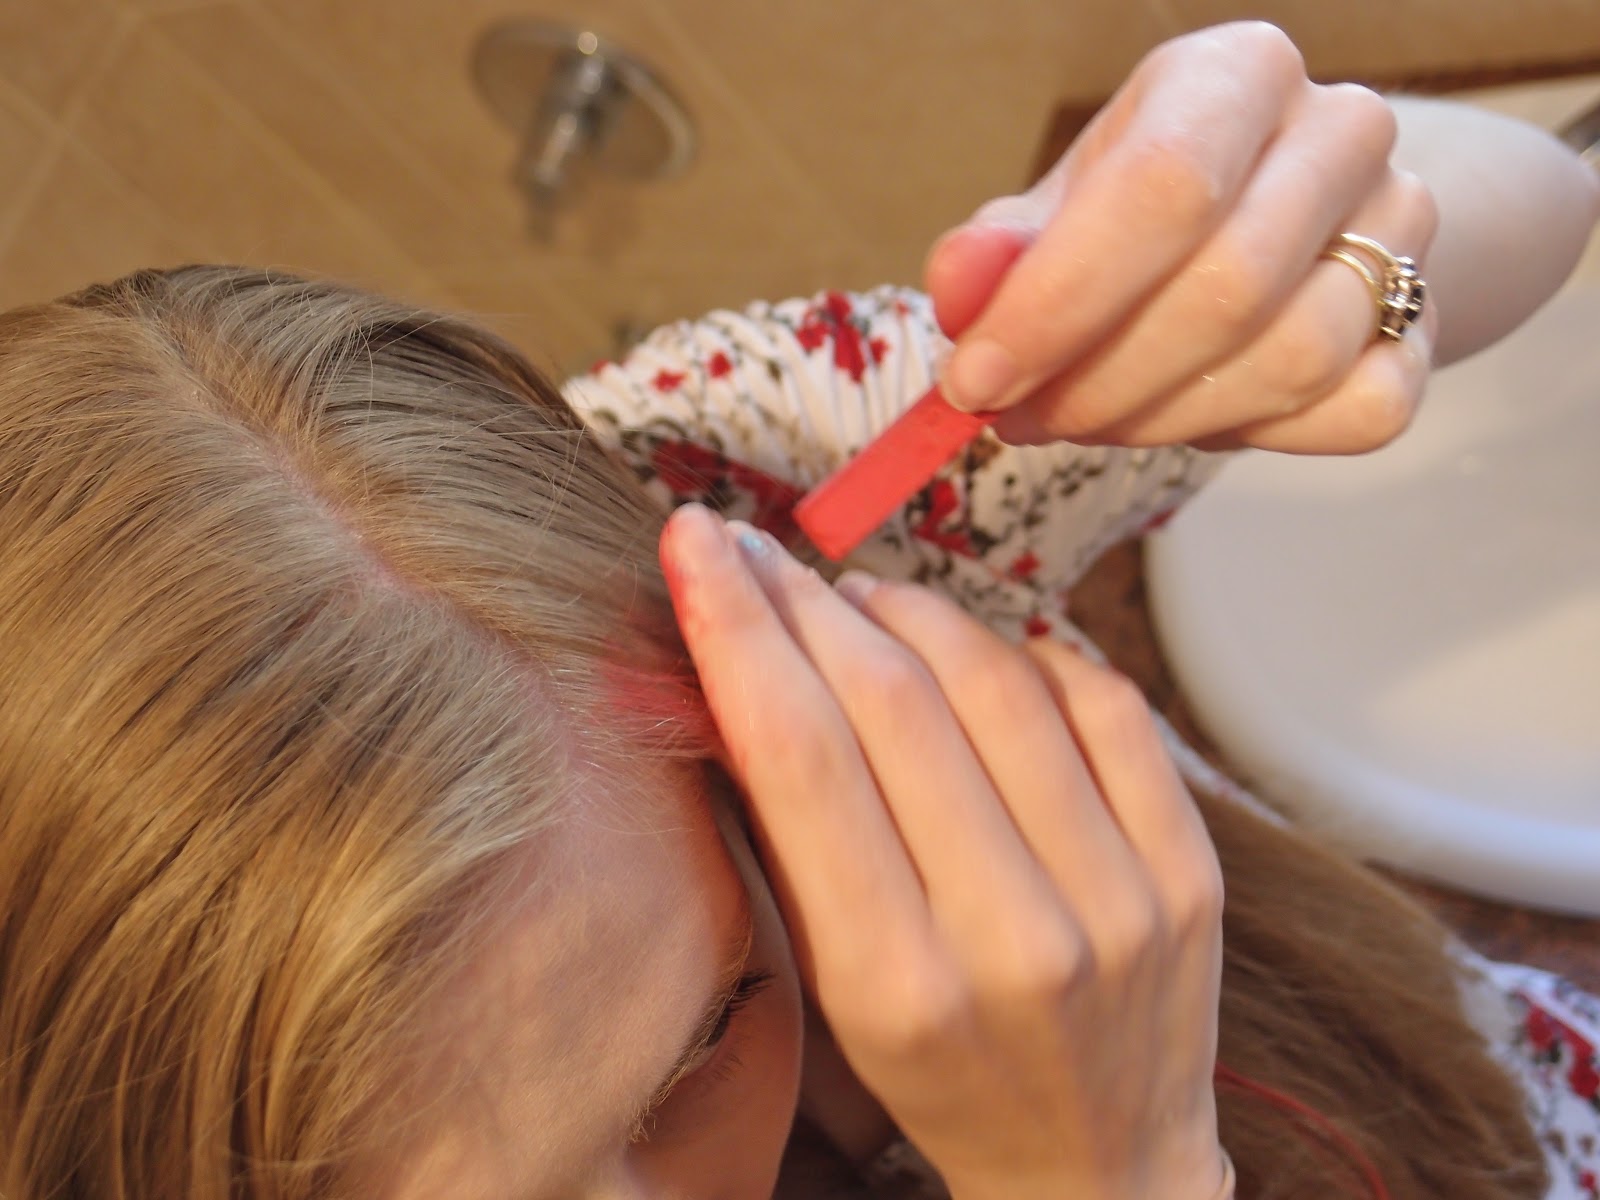
Wet the strand of hair you want to colour.  If you don’t wet it, you’ll find it really hard for the colour to take.  Some people think that wetting your hair will make the colour dye, but it’s either that or have no colour at all.  You’ll probably need to re-wet the hair a few times before you’re done.  Pastels suck up so much water.

Next advice: twist!  This means that the hair isn’t smooth and therefore it rubs more pigment off the pastel.  It can make it hard to get all the hair coloured though. 

You will get it all over your hands, but it washes off.  Don’t be so precious!

Try to refrain from rubbing UP the hair, as this will damage it a lot and give you billions of split endz.  Nice downward strokes.  Like you’re stroking a cat.

You can stop at once side and look weird.
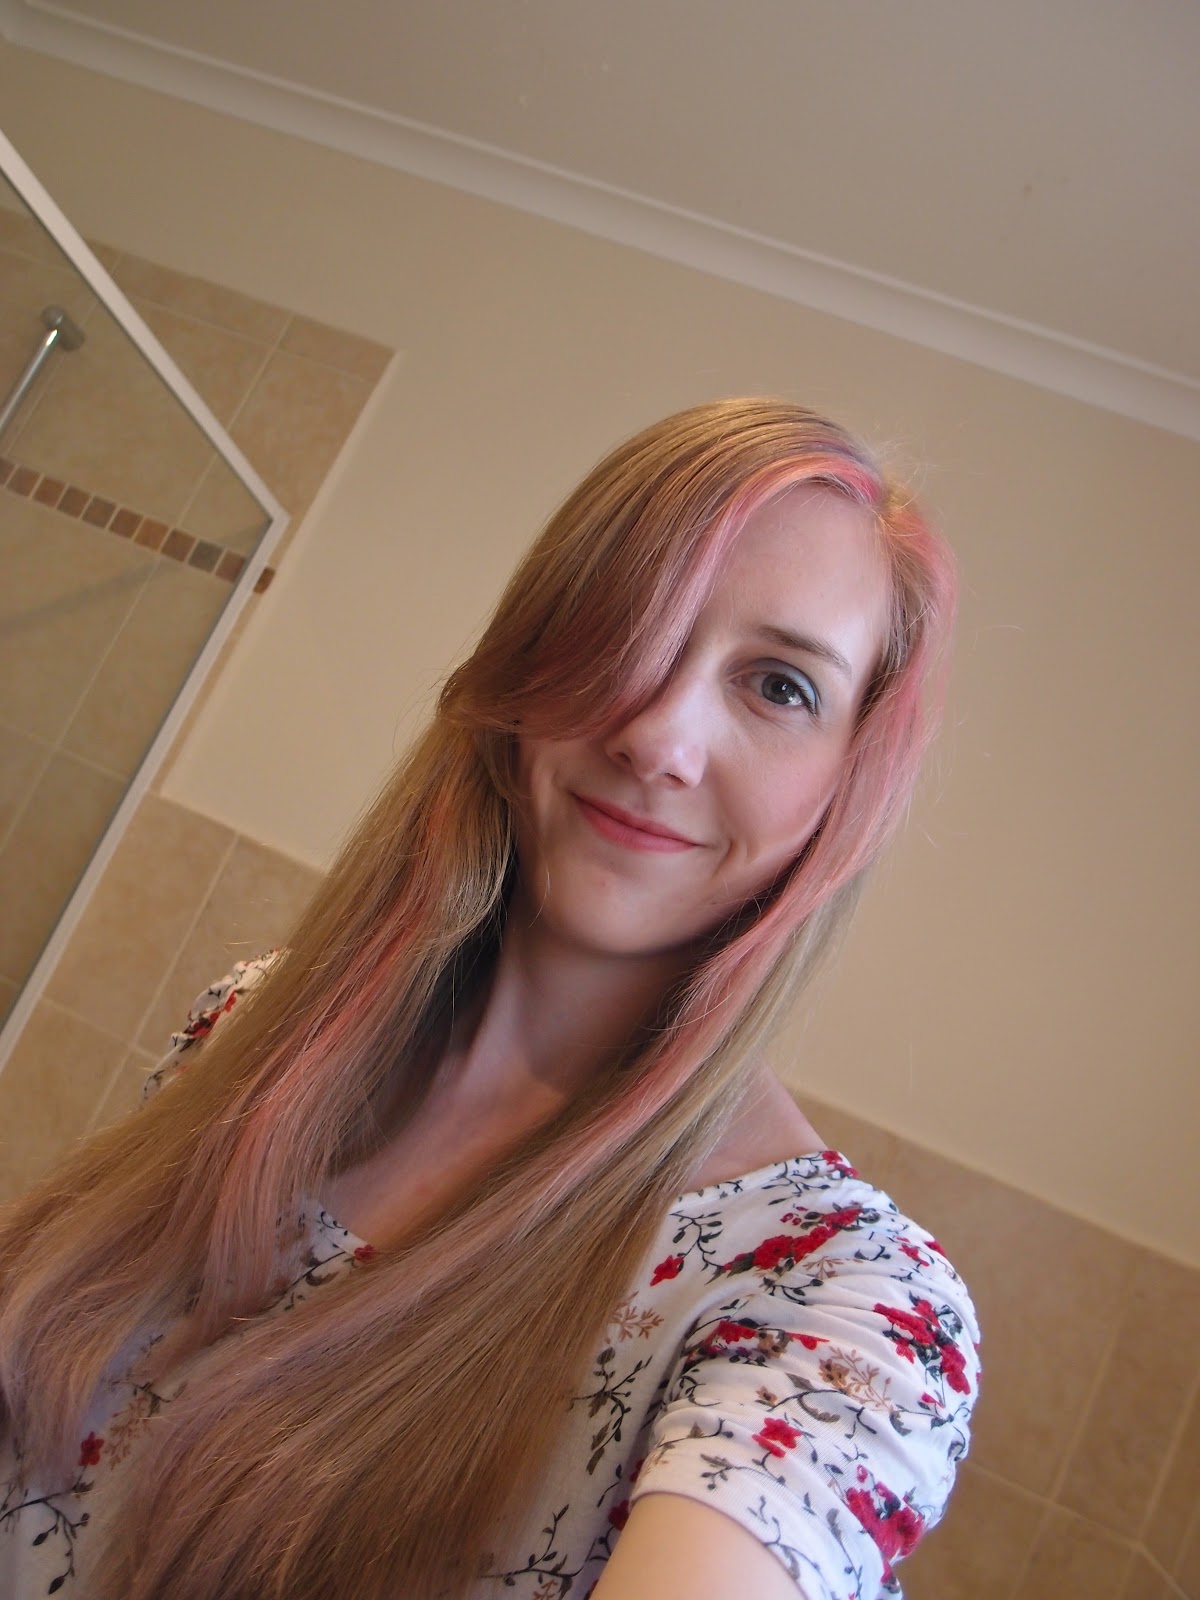
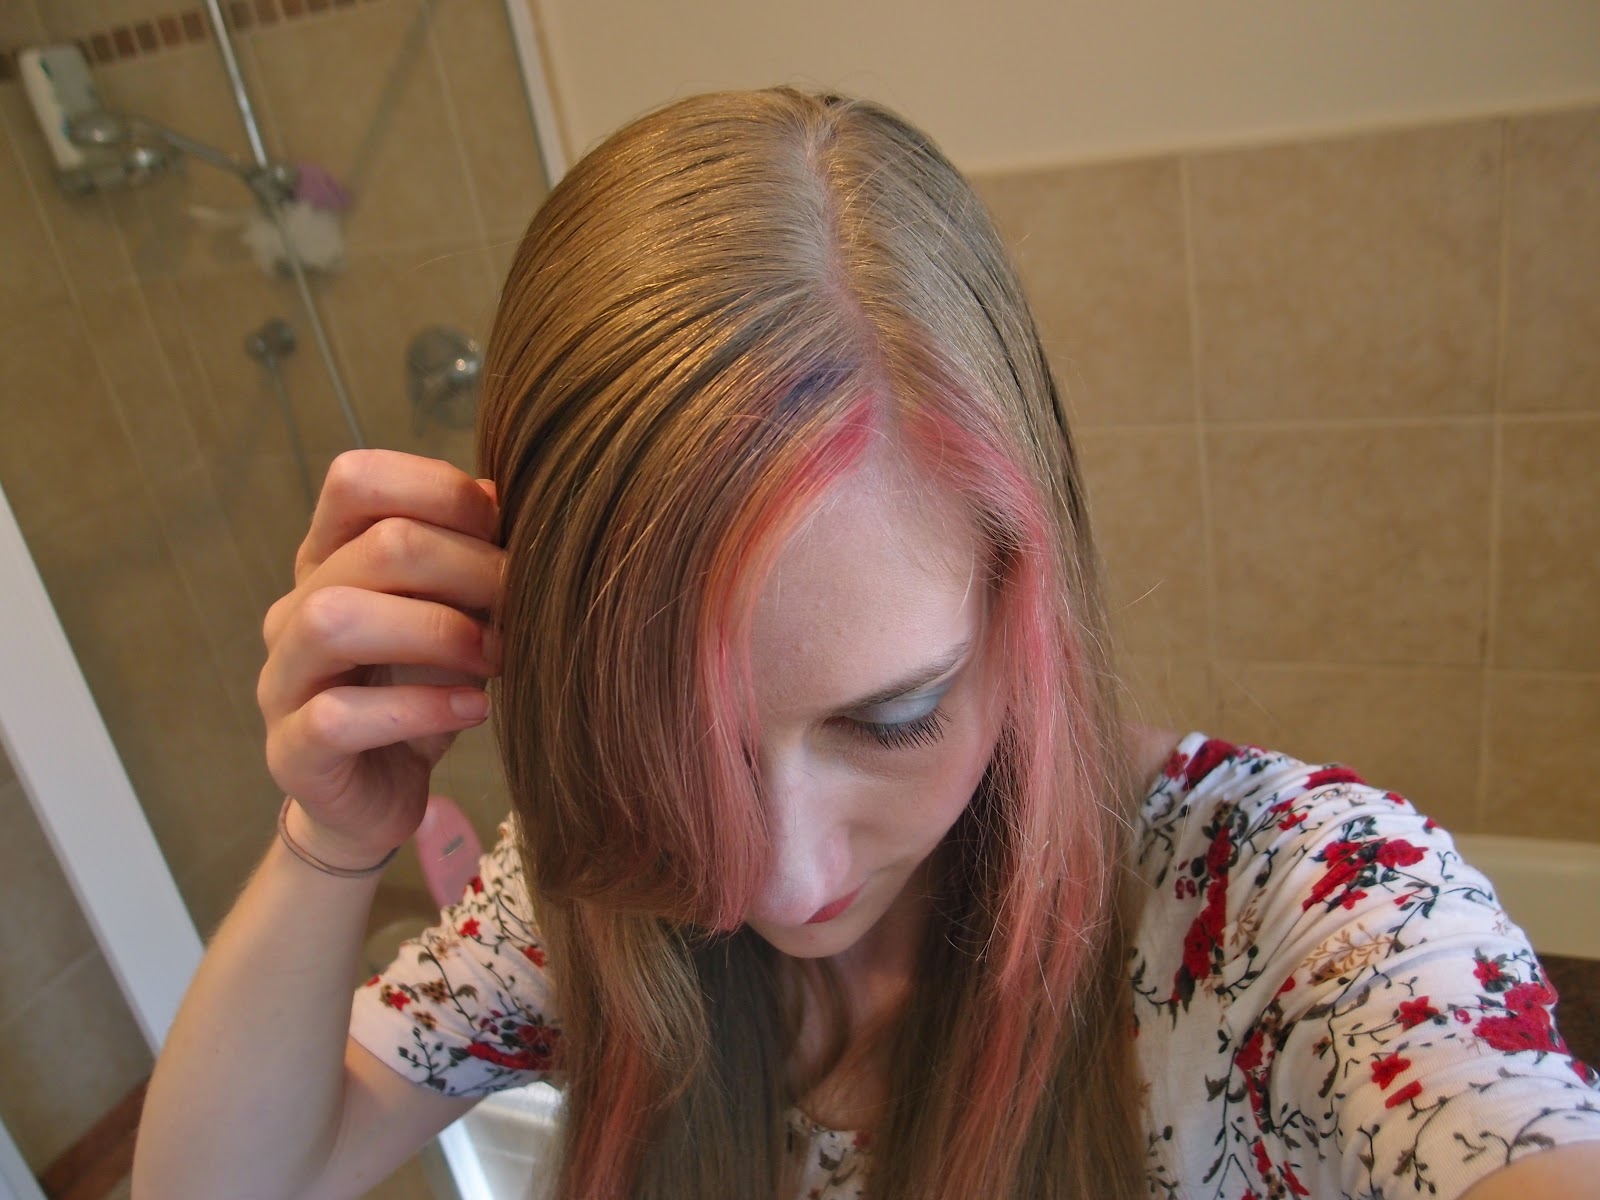
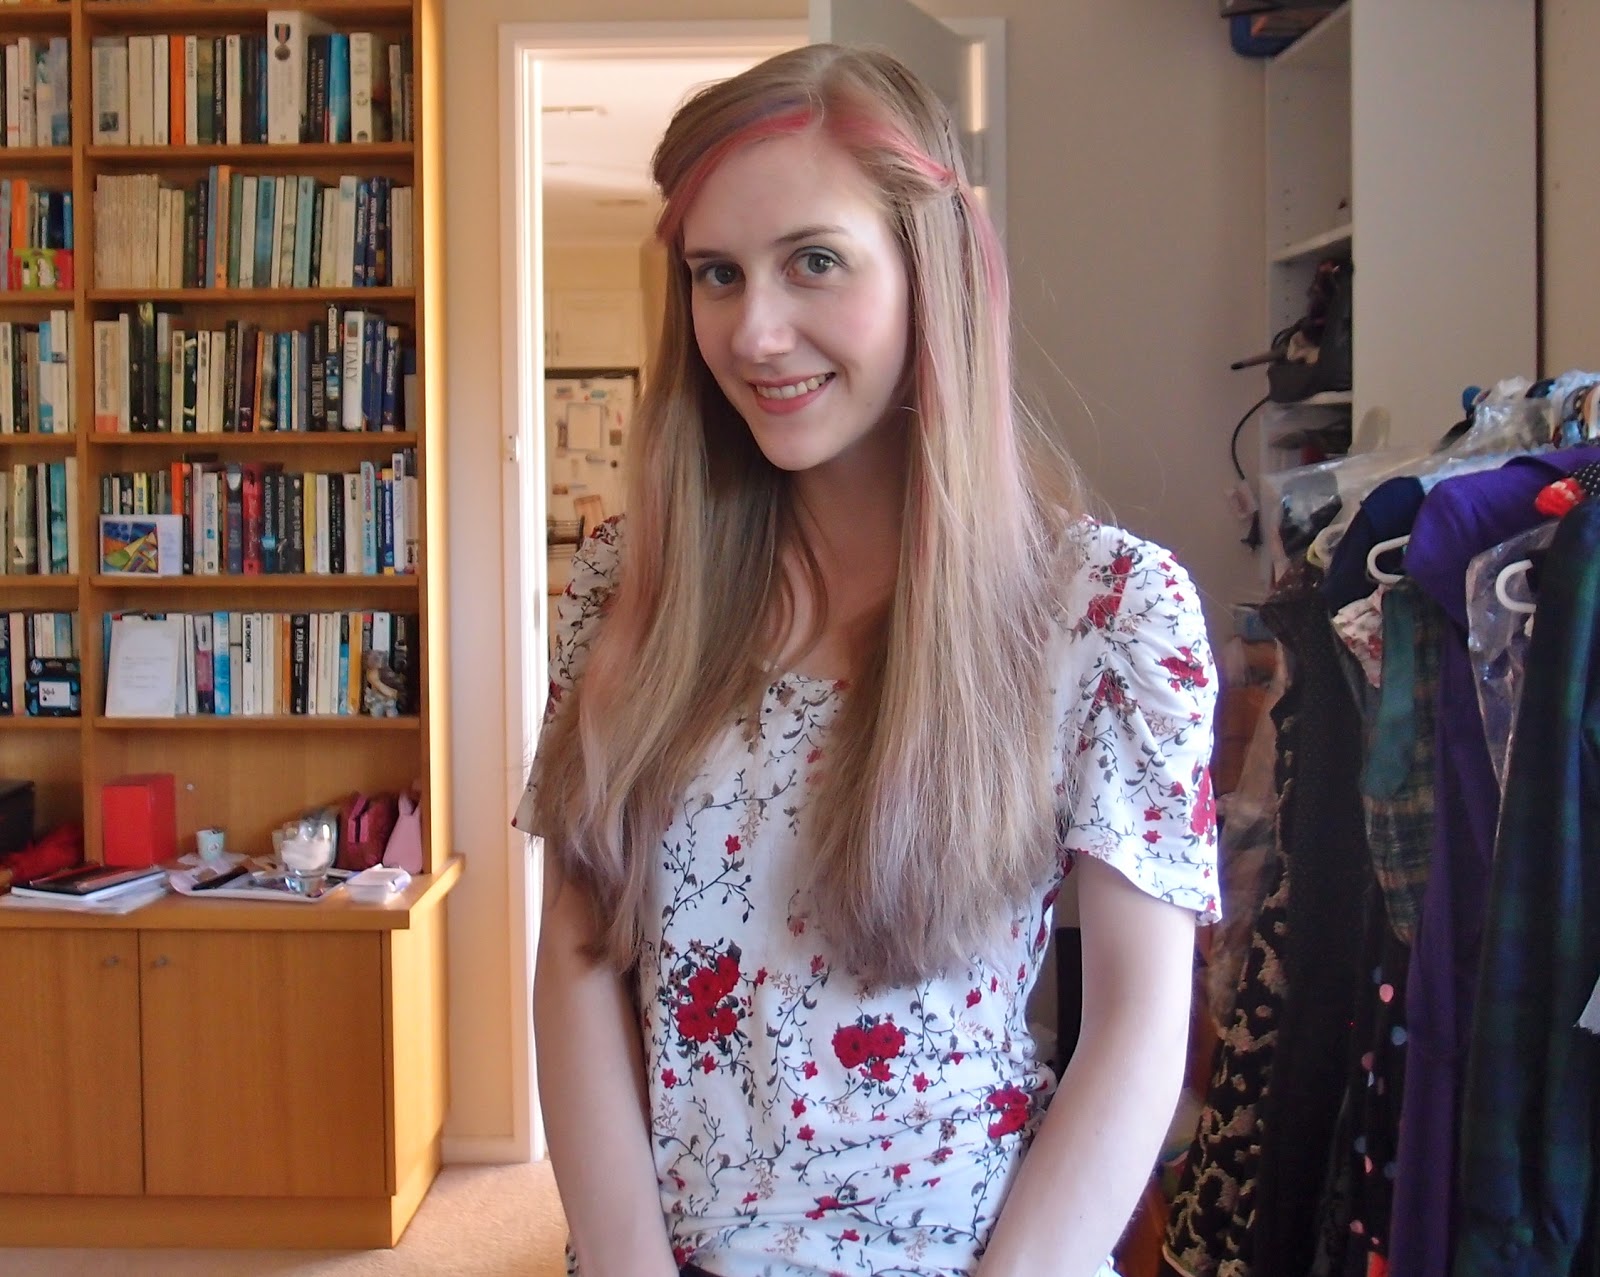
I ended up putting a pink and blue streak through my fringe, some pink at the sides and blue tips.  It looked pretty pigmented when I first did it!  The blue was really strong at first.
Now wait for it to dry.  Don’t brush it til after it’s dry or all your colour will come out.  Once dry, put some more moisturiser through it, since it will feel strawy and stiff until you do.  Comb carefully.
Mine dried with a nice soft pink, and the blue pretty much wore off.  I can hardly see any blue in my hair at all!

There’s a bit in my fringe I guess.

I like wearing my hair pinned back at the sides when it’s coloured.  Pretty!

From my last experiment with this stuff, I learned that you can wash nearly all of the pigment out on your first shampoo.  I was left with an extremely subtle peachy colour from the pink, and the blue completely washed out.  If you have darker hair, I’m sure it will immediately wash out, and if you have lighter hair than me, it might stay in a bit longer.  But I’m pretty sure that this is not permanent on anyone!