Uncategorized

Completed – owl eyes cardigan

So while I’ve been recuperating from my surgery, I knit a cardigan!
This is “Ginny’s Cardigan”, from the Interweave Harry Potter special magazine. While I was in America I picked up a copy of the pattern.
I used Berocco Ultra Alpaca in a brand new colourway which I can’t find on ravelry.
My buttons are shell buttons from my stash. I think I got them from a garage sale!
I made a few changes to the pattern. I shortened the amount of ribbing on the sleeves (got sick of it) and also shortened the sleeves considerably. My arms are short. I also opted for ribbing around the neckline instead of garter stitch, and I put a buttonhole in the neck band too.
I love the lace panel. It looks like owl eyes!
This cardigan is great because it’s long enough to wear with jeans but it doesn’t look weird with skirts either. It’s The Perfect Length! One criticism is that the sleeves are incredibly tight, especially near the wrist. I figured they’d loosen up with wear but they’re still pretty tight.
I also made the blouse I’m wearing – it’s New Look 6107 (or thereabouts) and the fabric is a silk from Liberty that my old boss gave me. She must have bought it twenty years ago! Isn’t it a great 90s print!
These photos were taken on one of the first walks I took after my surgery so no makeup. That’s why I look a bit bedraggled. But you don’t read this for my face do you! Do you?
I am writing this post using Blogsy, which is an iPad app for writing blog posts. We’re going overseas in a month and I want to blog without my laptop! So far it’s ok, but I think anything on iPad will be a bit cumbersome. Does anyone have a suggestion?


colourwork, knitting

How to make colourwork patterns using Excel

How to use Microsoft Excel to create colourwork for existing patterns
and
“Christmas Jumper” charts
 
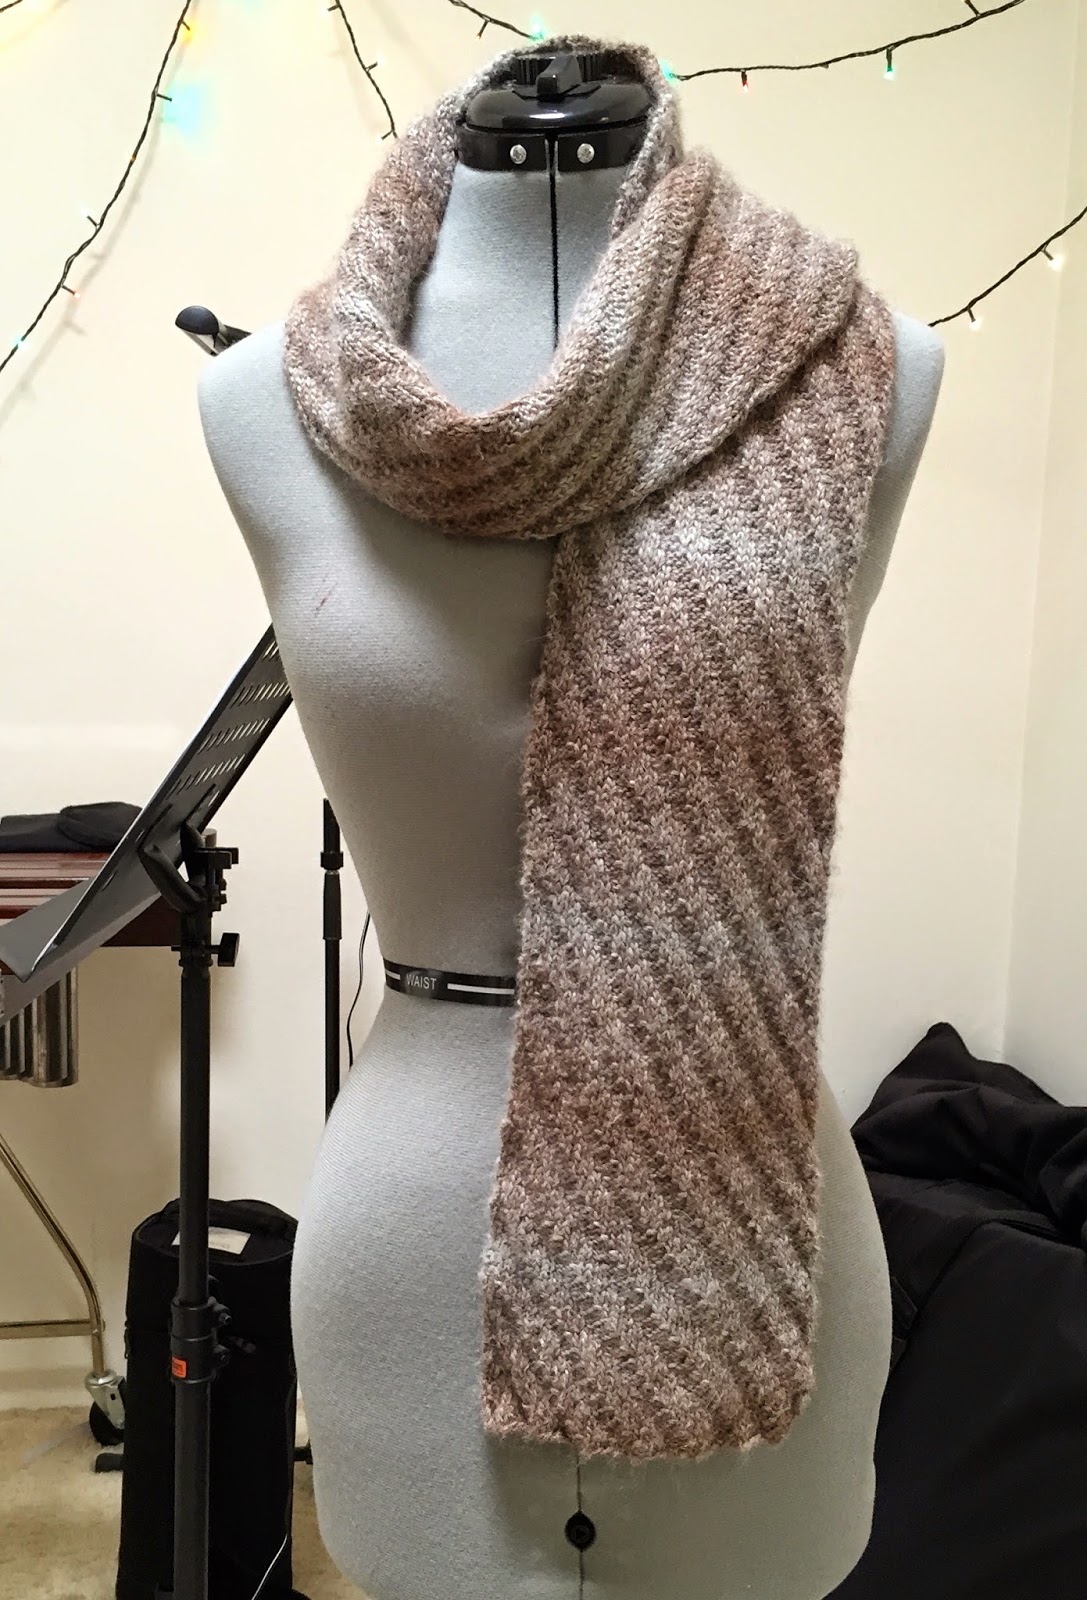
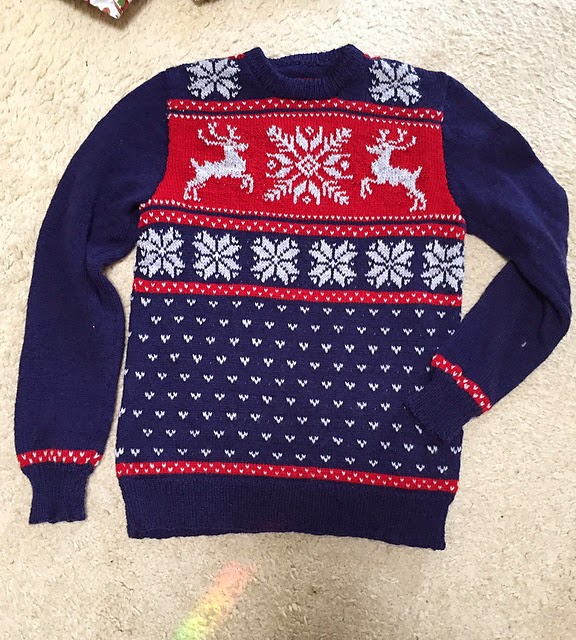
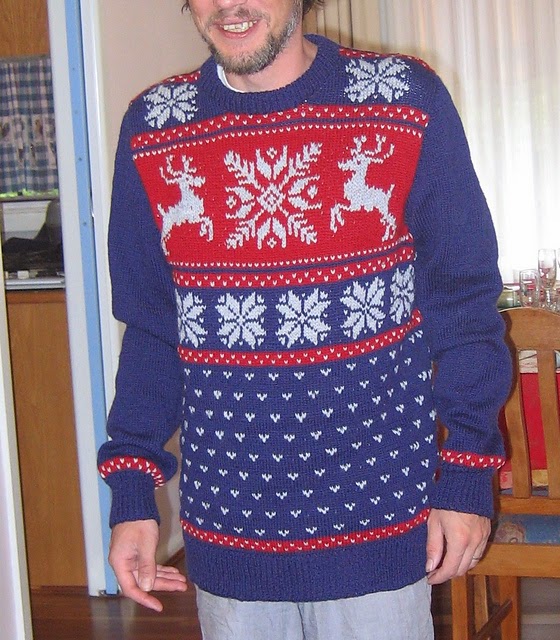
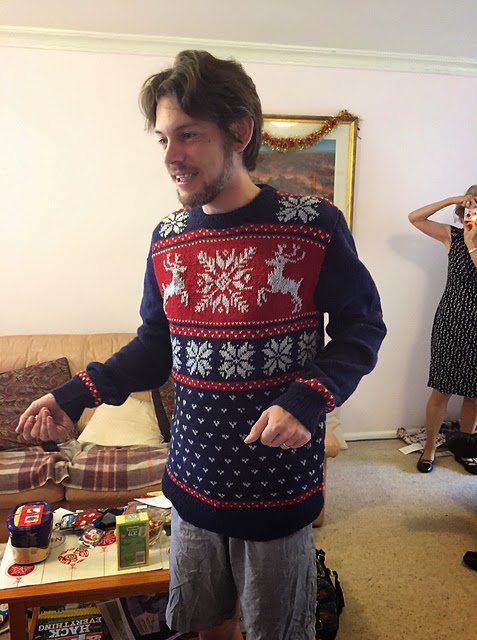
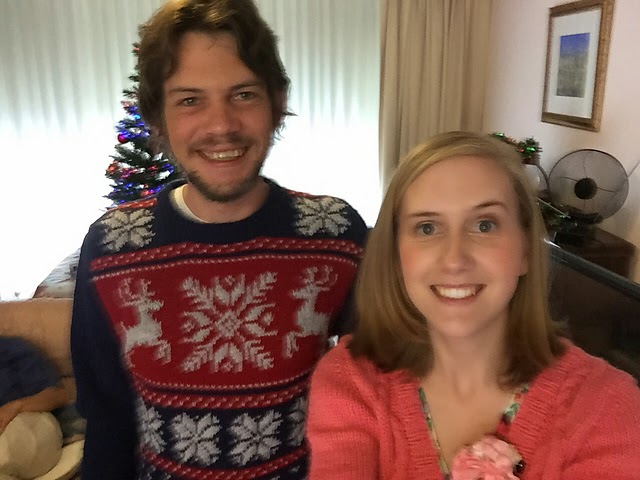
After the popularity of the Christmas Jumper I made, I decided to share my process.  Many people on Ravelry asked me to share my pattern – however I used a commercial pattern for the construction and only originally created the colourwork.
In this tutorial I will show how to put your own unique colourwork designs on an existing jumper pattern, using Microsoft Excel.
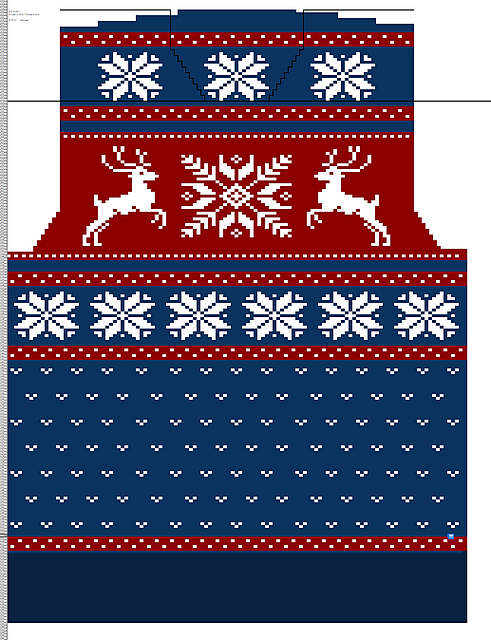
For those wanting some charts from my Christmas Jumper, they follow after the tutorial.  You will need to space these charts to fit your unique stitch count.
Before we begin, you will need a pattern to draw up.  I have chosen a free women’s sweater pattern from Rowan as an example, and will take you through the entire process.  You should use a pattern you have with the shaping you like.
This is easiest with a set-in sleeve pattern as you don’t need to worry about raglan or round yoke decreases.  It’s also best to have side shaping (if any shaping) instead of darted shaping. It creates nice flat canvas for colourwork.
One disadvantage of using this kind of pattern is that you usually have to work it flat, whereas colourwork is easier in the round.  You can always convert flat patterns to round, but will need to steek the sleeve holes (an advanced technique I won’t go into here).  For this example, I will colour in a set-in sleeve pattern with the intention of doing stranded colourwork on the knit and purl sides of the fabric.
My size is XS so this tutorial will be in that size.
Let the tutorial begin!
First open up Excel and make all the cells square.  Do this by selecting all (command a) and dragging the vertical cell wall to make a square.
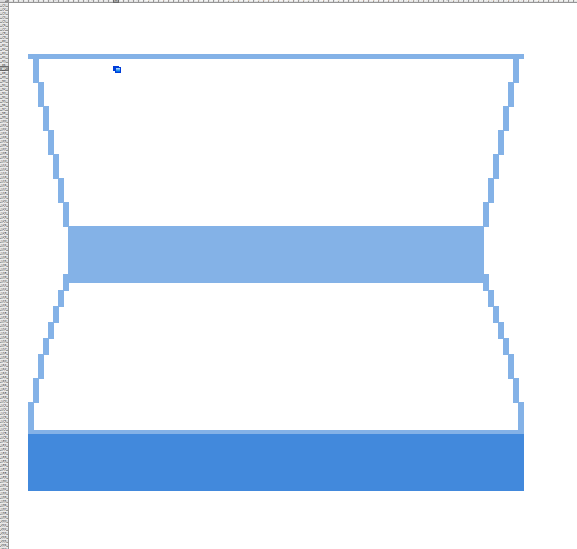
Now we need to make an outline of the pattern on the spreadsheet.  Go down the page quite a lot (if your pattern is bottom-up like mine) and a few squares in from the edge.  Check to see how many stitches to cast on, and colour in a row of that many squares.  Colour in by highlighting the squares and clicking on the “fill” button.  For me, it is 99 stitches.
The first section is usually rib, which I like to make a darker colour so I remember later not to colour it.  In my case, I work 14 rows in rib.  So I’ll drag up from the 99 stitches 14 rows and colour that whole block.  So far you’ve got a rectangle.
Now we get to outline the sweater.  Following the shaping (if you have any), outline the edges of the sweater.  For me, I am supposed to knit 8 rows and then decrease on each side, and then every 6 rows, and then every 4 rows.  Then it increases again.
Sometimes you will come across something like “Knit until piece measures -cm from cast on edge”.  This is when you’ve got to look at your gauge and figure out the maths!  Mine says “continue straight until back measures 38cm from cast on edge”.
First, look at your row gauge.  Mine is 32 rows to 10cm.  So there’s 3.2 rows in 1cm.  3.2 x 38cm = 121.6 (let’s call it 122).  I’ve already done 109 rows from the cast on edge, so there’s only 13 rows to go.  Draw them in.
Now usually you have to decrease for the armholes.  Just like in the waist shaping, draw it in.  Continue until the cast off edge.
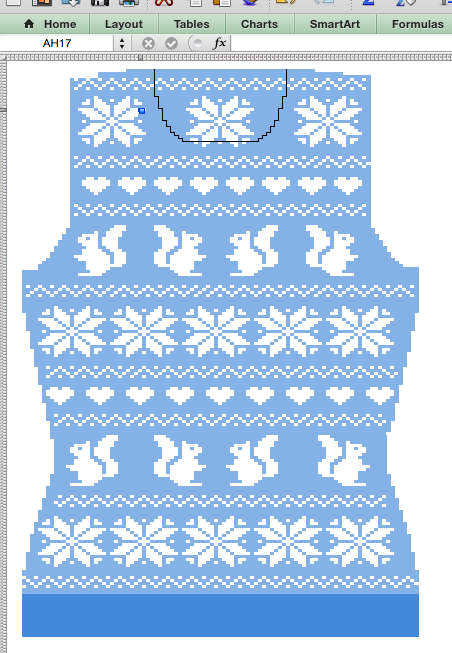
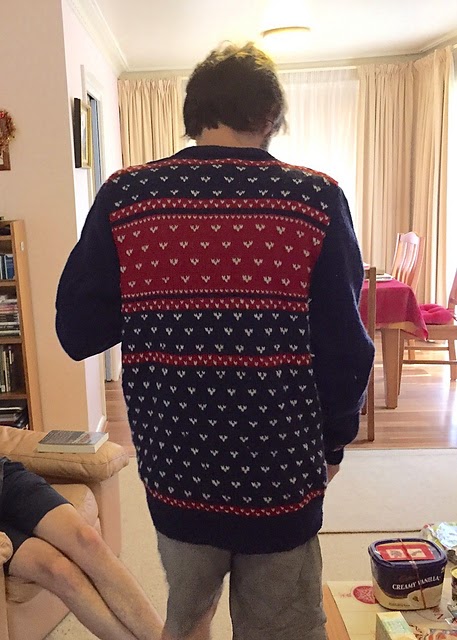
For most standard set-in sleeve jumpers the front and the back are very similar.  For mine, it only begins differing at the neckline. Rather than make a whole new drawing for the front, I use “borders” on the cells to outline where the front is different from the back.  Just following the outline like we did with the rest of the sweater.  This means that your front and back will have identical colourwork (except for the top middle which will be absent in the front).
I didn’t do it here, but it can be helpful to draw a line down the centre.  This just helps you keep the patterns symmetrical.
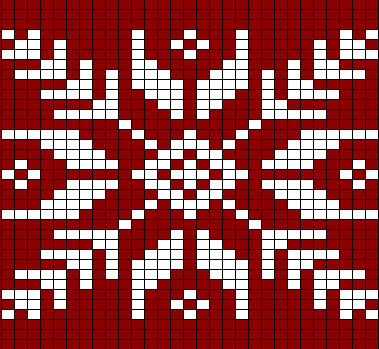
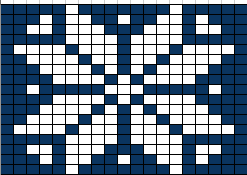
Now is the fun part! Colouring in!  Start experimenting with different geometric designs.  Good resources are cross stitch charts, existing fair isle patterns, and pixel art. Simple little bands are easy to make, you only need two or three rows to make them effective.  Snowflakes are a bit trickier, so you might want to look something up and copy it.
Keep in mind that you don’t want too many stitches before changing colour. If you leave one colour too long your floats can become unweildly or tight.
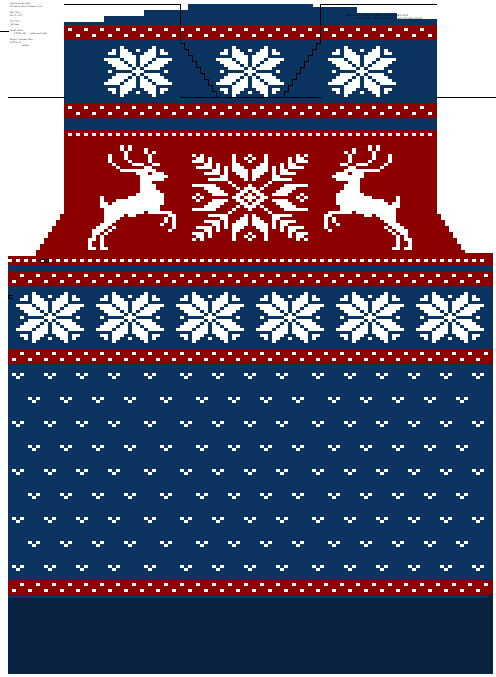
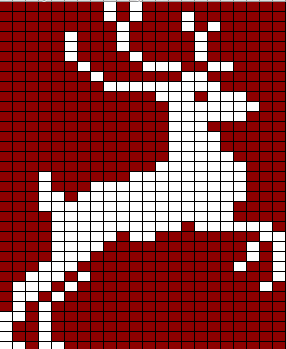
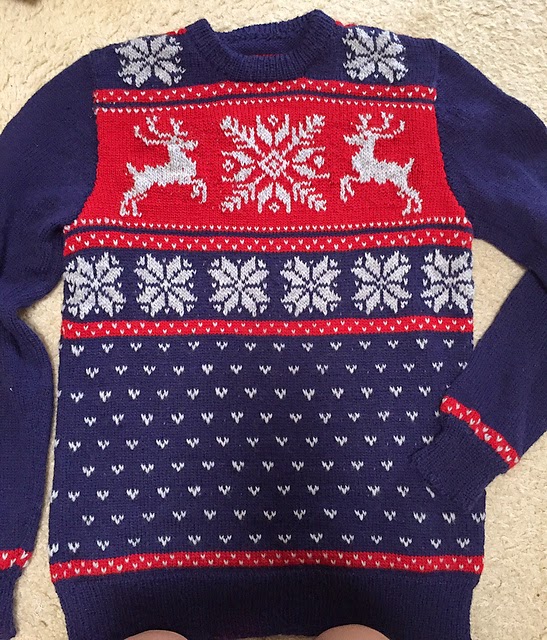
For my example, I used hearts, snowflakes, squirrels, and a pretty border pattern.  I love the way it ended up!
When repeating a pattern across the jumper, you need to keep the design centred.  This means that when the stitch count is different (e.g. at the waist shaping) you may need to adjust the spacing between the motifs.  My two rows of squirrels are spaced differently to keep them centred.
Sleeves can be lovely with full colourwork, but I prefer sleeves with only a little colourwork.  If I were to knit this I would put the border pattern or hearts motif just after the cuff ribbing on the sleeves and leave the rest of the sleeves blank.
A great thing about making this outline of the pattern is that you don’t need to read the pattern.  All of your shaping is worked into the chart. This chart is all you need!


Please check out my Ravelry page and my designs on Ravelry:

Christmas Jumper charts!
Uncategorized

First pattern published to Ravelry – Diagonal Stripe Scarf!

I’ve published a pattern you guys!  It’s an easy double-sided scarf pattern.
To be honest, originally I wasn’t going to publish this pattern.  I just started winging this diagonal design on the plane home from America a couple of months ago.
It’s an easy pattern using only knit and purl stitches.  If you make it as long as I did, it’s a great length scarf for all kinds of different tying methods!
It’s shown on my female mannequin but I actually made this for my dad for his birthday.  It works equally well as a womens pattern though!  Scarves are good like that.
It’s for sale on Ravelry for $3 just to test the waters.  I have some other patterns up my sleeve to release sometime so I hope this is the beginning of something good!
Uncategorized

Brief update

Hi Friends, just a brief update to let you know what’s been happening.  3 things:

Firstly, and most excitingly, my brother’s jumper made the Ravelry blog!  That’s right, I’m in Community Eye Candy for December 31st.  You can view the Ravelry blog if you’re a member, it’s just http://www.ravelry.com.  Since then I’ve received almost 40 comments and almost 200 favourites!  Many of those comments were asking me to release the pattern, so that is something I will be working on in the next few days.  I am totally thrilled and flattered.  I am currently trying to think of how to present the work, and whether I should charge money for it!

In other news, I have been in hospital with appendicitis!  The surgery had a few complications due to my appendix being weird, so it was open surgery instead of keyhole, and they took more guts than intended.  This means that I will be recovering for quite a few more weeks.  I was in hospital for 5 days (over New Year) and am now home, but still feel pretty awful.  It was a huge ordeal and I don’t want to go into it on my blog.  Luckily I can knit now that I don’t have IV drips in both arms.

Finally, I’ve been working on a scarf of my own design and I think it’s good enough to publish – simple but effective, and double sided!  Hopefully I can get to that soon too.

Hope you are all doing better than me!  But good things are ahead 🙂

Uncategorized

Completed – Christmas Jumper

This year, my brother requested a Christmas Jumper.  Despite it usually being super hot on Christmas Day!  Of course I said yes.
The pattern is just a regular old pieced jumper by Patons.  I have several pattern books from Patons from various decades, and compared two similar jumpers from the 1970s and 2000s… the pattern was almost exactly the same.  So you could use any Patons jumper pattern for this.
I measured my brother and decided on the size, but made it longer since he likes jumpers that way.  
To make the fair isle design, I charted out the pattern in Excel and just coloured in! Since it is pieced, I had to do the stranded colourwork on the purl side too.  Knit rows are read R-L and purl rows L-R.
The back is just the little V design… I had already done the front and never wanted to do another reindeer in my life.
It took me right up until Christmas day to have this ready.  I knit until the 22nd, then soaked it and blocked it on the morning of the 23rd.. and it took two whole days to dry properly!  It was wrapped on Christmas morning!
I wasn’t too happy with how my stranding turned out… it’s a little lumpy.
Can you spot the differences in the reindeer?  I literally only noticed after I’d given it and was looking at the photos… but there is something weird going on there.
Most importantly, my brother loved it and wore it most of the day.  Until it got too hot!
Apart from that, we had a lovely Christmas day.  We ate turkey and ice cream plum pudding and played Bocce outside.  The weather was beautiful and it was the perfect Australian Christmas.